Get Your ALL ACCESS Shop Pass here →


Dissolving Candy Cane Experiment
The choice candy for the holiday season makes for an awesome science experiment! Our dissolving candy cane experiments are an easy and frugal Christmas science experiment .
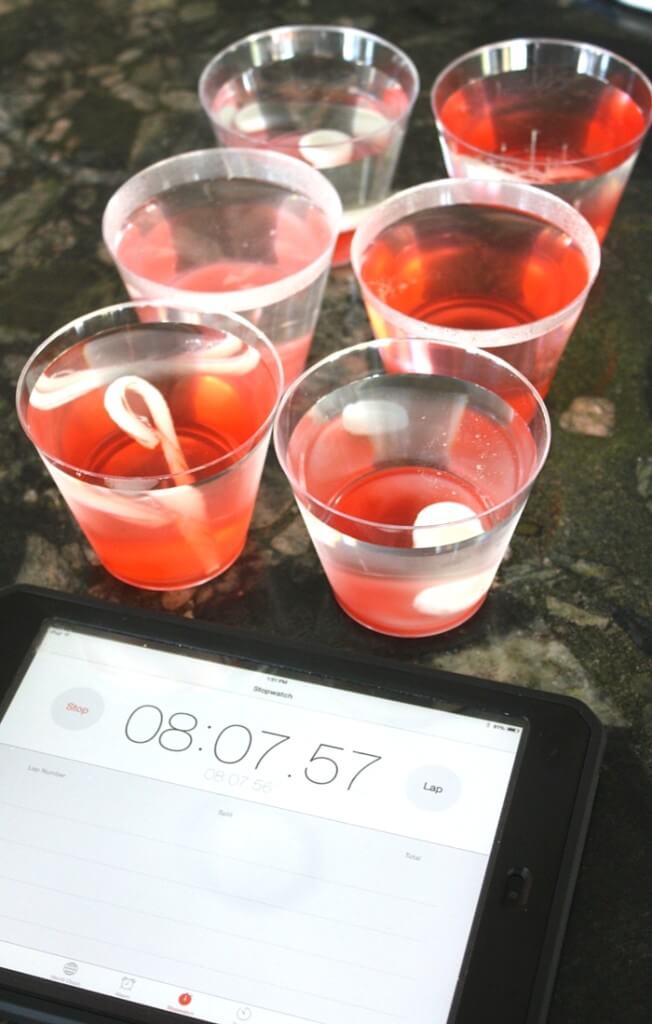
#1 Candy Cane Experiment: Temperature of Water
Variation: I was trying to decide if we should use the candy canes or the peppermints, so my son suggested we do both. Then I suggested we weigh the candy cane and the peppermint to see if they were the same weight.
We discovered that both candies are the same weight but differ in shape. We used a kitchen scale and had the opportunity to discuss the numbers and measurements between ounces and grams.
💡 How will the shapes of the peppermint and the candy cane affect the results? Which will dissolve faster? Make a prediction, set up an experiment, and test your theory. You can read more about the scientific method for kids here.
You Will Need:
- Small Candy Canes
- Small peppermints {Optional}
- Stopwatch/Timer and /or Kitchen Scale
- Printable Science Worksheet {scroll down}
Experiment #1 Set Up
STEP 1. Fill your cups with the same amount of water but at different temperatures. Make sure to label what you have in each cup.
We chose room temperature water, boiled water from the kettle, and freezer cold water.
WARNING: Younger kids will require adult assistance for handling very hot water!
STEP 2. Add one candy cane or peppermint to each cup. Make sure you add the same type of candy cane to each cup.
Optional: Makeup two cups of each type of liquid if you want to compare candy canes and round peppermints.
STEP 3. Set the timer to record how long each peppermint or candy cane takes to dissolve.
STEP 4. Observe what happens.
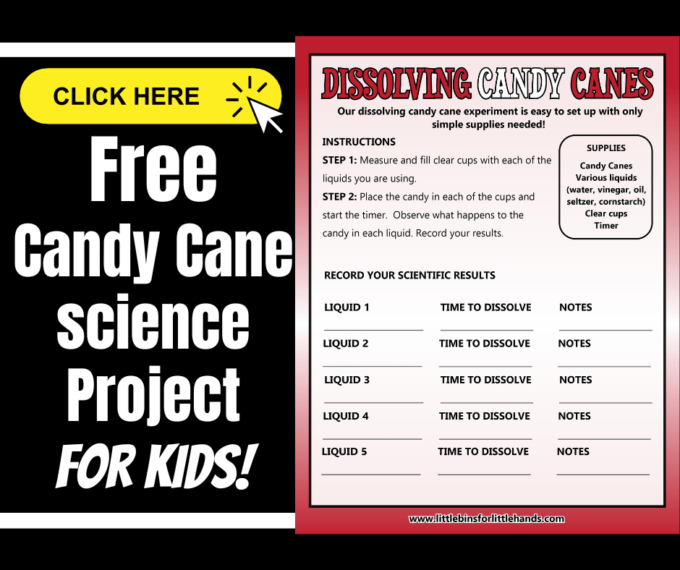
Please download our candy cane science worksheet below to record your results.
Candy Cane Experiment Worksheet
Add this dissolving candy cane experiment page to a science journal to extend the activity for older kids!
#2 Candy Cane Experiment: Different Liquids
This candy cane experiment explores how fast the candy cane dissolves in different solutions that you can easily make up for yourself, salt water and sugar water.
How will the type of liquid affect the results? Which will dissolve faster?
- 6 cups of water
- ½ cup sugar, divided
- ½ cup salt, divided
- 6 candy canes
#2 Candy Cane Experiment Set Up
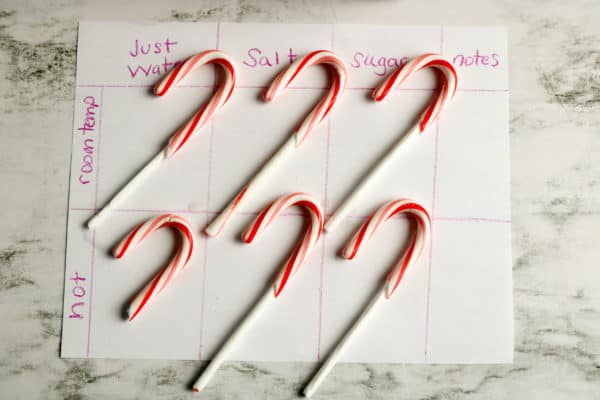
STEP 1. To make your solutions… Add 1 cup of water to three different cups. Then add ¼ cup sugar to one of the cups, stirring until it is dissolved. Add ¼ cup salt to the second cup, stirring until dissolved. The third cup is the control.
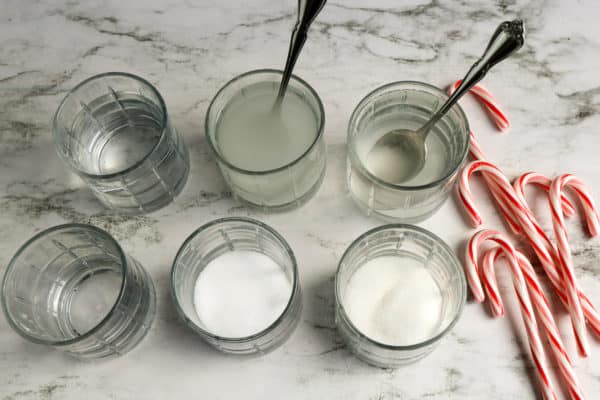
STEP 2. Heat another 3 cups of water until hot. Place 1 cup of hot water into another three cups. Into one of these cups, add ¼ cup sugar, stirring until it is dissolved. Into the second cup with hot water, add ¼ cup salt, stirring until dissolved. The third cup is the control.
STEP 3. Place one unwrapped candy cane into each cup of water. Set a timer for 2 minutes.
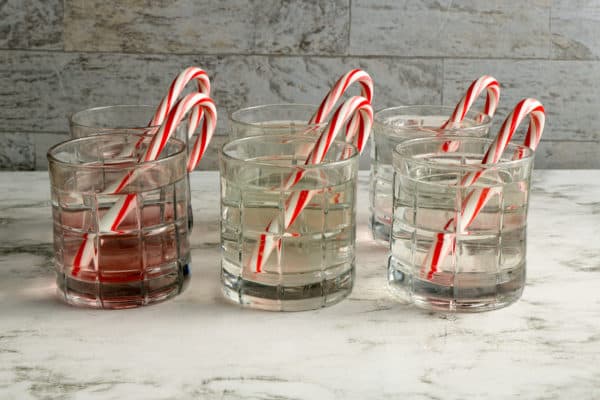
When the timer goes off, check the candy canes and make note of which have changed. Continue checking the candy canes every 2 to 5 minutes, making note of the changes.
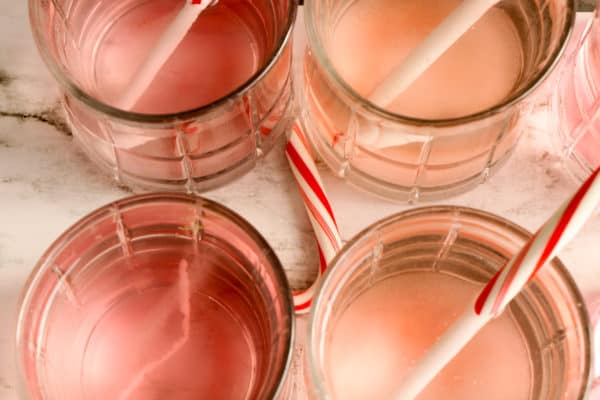
Discuss which liquids caused the candy canes to dissolve faster/slower and why.
If desired, repeat the experiment using different room-temperature liquids such as vinegar, liquid dish soap, oil, soda pop, etc.
Why Do Candy Canes Dissolve?
Water vs oil.
Candy canes are made up of sugar molecules! Sugar dissolves in water because energy is given off when the sucrose molecules (which make up sugar) form bonds with the water molecules. The sugar molecules attract water molecules and if powerful enough of an attraction, will separate and dissolve!
What about oil? The sugar in candy canes is soluble in water but not in oil. You would have noticed that when you place a candy cane in oil, it won’t dissolve in the same way it would in water.
The solubility of a substance depends on the nature of the solvent (the substance in which the solute dissolves), and sugar, the main component of candy canes, is hydrophilic (water-attracting) but hydrophobic (oil-repelling).
The Effect of Temperature
The solubility of substances, including candy canes, generally increases with temperature. In hot water, molecules move more rapidly than in cold water because they have higher kinetic energy . This increased movement and energy lead to more collisions between water molecules and sugar molecules on the surface of the candy cane.
The collisions between water molecules and sugar molecules are crucial for the dissolving process. With higher temperatures, there are more collisions, so more opportunities for sugar molecules to break away from the candy cane and become surrounded by water molecules.
The increased energy and movement at higher temperatures also weakens the intermolecular forces holding the sugar molecules together in the candy cane. As a result, it is easier for water molecules to break these forces and incorporate the sugar into the water, leading to a faster dissolving time.
Try These Candy Cane Activities
- Crystal Candy Canes
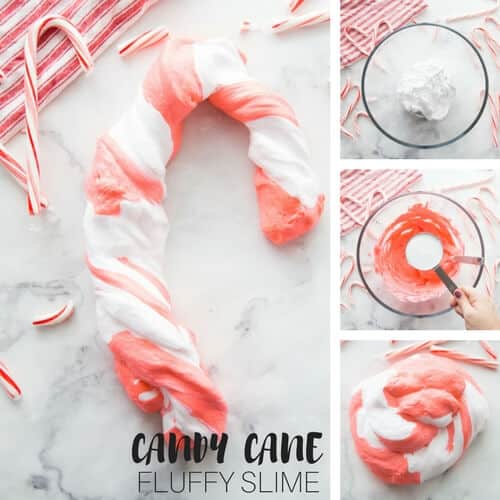
- Fluffy Candy Cane Slime
- Candy Candy Slime
- Peppermint Oobleck
- Candy Cane Bath Bombs
- Bending Candy Cane Experiment
- Paper Lollipop
More Fun Dissolving Experiments
- What Dissolves in Water
- Dissolving Gingerbread Cookies
- Dissolving Candy Hearts
- Classic Skittles Science
- Floating M&Ms
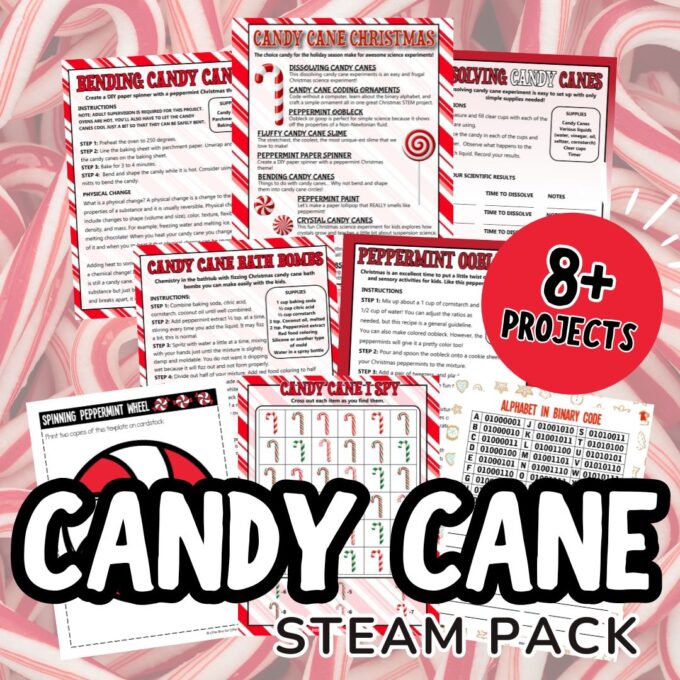
Printable Candy Cane STEAM Project Pack
For a complete pack of instructions, templates, and extras, grab our Candy Cane Project Pack !
One Comment
- Pingback: Printable Christmas STEM Activities and Science Experiments for Kids
Comments are closed.

Subscribe to receive a free 5-Day STEM Challenge Guide
~ projects to try now ~.


15 Candy Cane Science Experiments: Fun Holiday Hands-on Activities
- August 24, 2020
- Science Experiments
Welcome back to another post with a pack of super fun and easy to do science experiments!! Today, what are we going to choose the key ingredient to do our entertaining experiments and what kind of science are we going to explore and discover!? I know you all are eagerly waiting and I am also equally excited to reveal the hero of our today’s science activities. Here we go, it is CANDY CANES!! Whoa! Yes, make your Christmas and holiday vacation more fun and creative while investigating candy canes.
I have a question to all the kids of all ages out there!! Kids, what do you do with the left over candy canes!? Mostly, the left over candy canes go into the bin right!? But here after we are not going to waste any small piece of candy cane but uses to do some experiments that discovers the science behind it. Yes, it is so amazing and super fun to work with candy canes!! Continue reading our post to find best science activities that seriously takes 2-5 minutes to set up and 10 minutes to investigate.
Candy Cane Science Experiments
In fact, my children had a quality time with these activities and believe me you and your children also be amazed by the surprising results. Read on for the fun and easy science experiments to do with candy canes.
1. Candy Cane Science Experiment
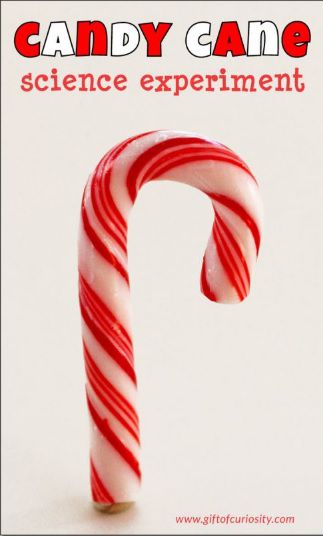
Candy Cane science experiment is a perfect way to engage your children in two ways i.e. as a Christmas vacation activity and a science activity for kids. If you are looking for a fun Christmas Science for kids, then this simple candy cane experiment is perfect for all ages. In addition, kids will get to know about different types of liquid solutions and their properties. It is interesting right!?
Have a look at the full description of the experiment here: Candy Cane Science Experiment
2. Dissolving Candy Cane Experiment
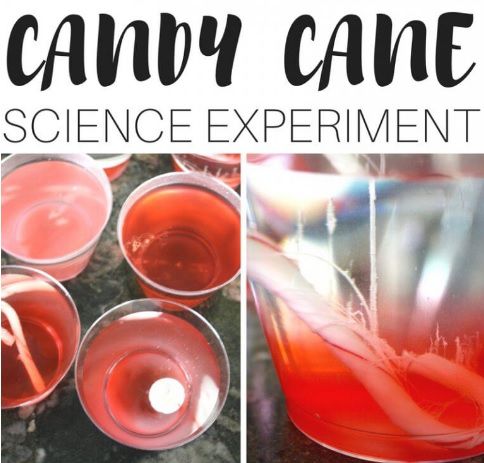
Check out this most popular dissolving candy cane science experiment and learn how fast or slow candy canes dissolve at various temperatures. Kids can try candy canes of different sizes and repeat the same process for all sizes to analyse the rate of dissolving in the water. Learn which type of liquid makes difference in dissolving candy canes in an awesome way!
Have a look at Dissolving Candy Cane Experiment to explore dissolving solutions and its science.
3. Colored Candy Canes Science Experiment
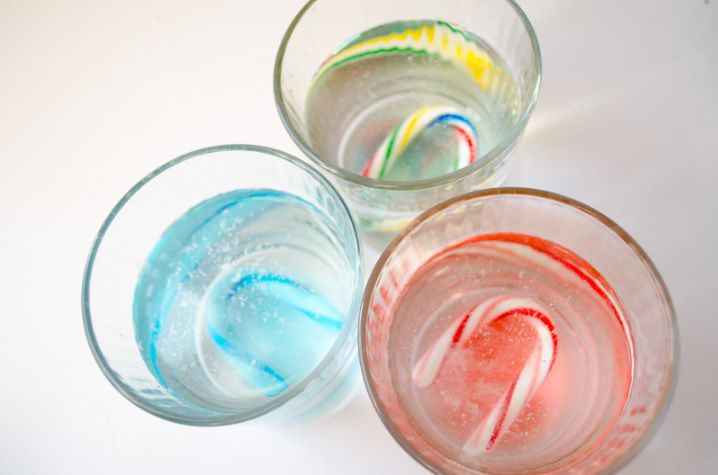
Best science activity, which is perfect for Christmas Science Experiment for pre-schoolers, younger and older kids!! Do you know why? This experiment is considered as a scientific treasure since it reveals or proves an awesome science of ‘candy canes losing colors’. The impressive part of this experiment is, kids can extend the activity to other activities.
Check out here for the list of supplies and instructions: Colored Candy Canes Science Experiment
4. Bend your Candy Cane Science Experiment
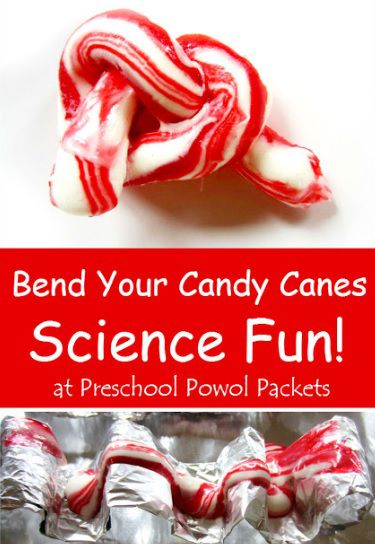
Recently, I was asked that “Is it possible to bend a candy cane?” from my little ones. I thought this is the best experiment to demonstrate bending candy cane and I got a good opportunity to explain the simple science behind it. This experiment is perfect for moms and teachers out there!! Kids will have so much fun with it.
We love to share this easy and simple experiment with you all as well. Click on Bend your Candy Cane Science Experiment
5. Peppermint Candy Cane Science Experiment
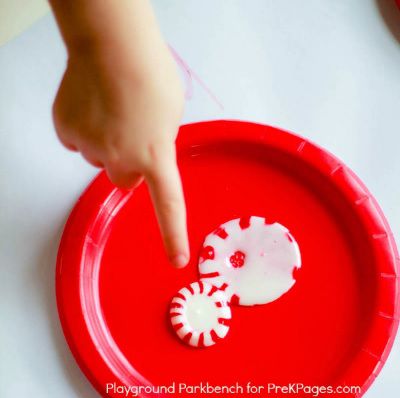
Science experiments that relate to young children’s everyday life can captivate them to observe the magical results and motivate to repeat the experiment on their own! One such experiment is ‘Peppermint Candy Cane Science Experiment’. This simple activity adds a ton of Christmas fun while observing how peppermints and candy canes reacts with water at different temperatures.
Learn the science and maths concepts at one place i.e. Peppermint Candy Cane Science Experiment
6. Christmas Crystal Candy Canes Science Experiment
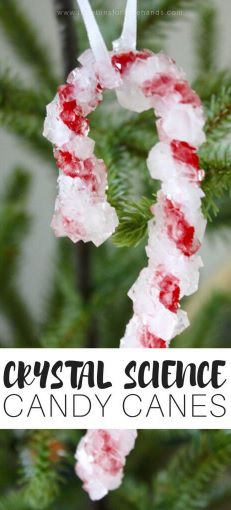
The name suggests that this is the perfect Christmas Science Experiment but it can be done anytime anywhere all around the year. Kids will have a great opportunity to learn about suspension science. Also, encourage your home schoolers and pre-schoolers to observe and make analysis on the changes happening while growing crystals.
So do not wait to grab the complete details: Christmas Crystal Candy Canes Science Experiment
7. Fizzy Candy Canes Science Experiment
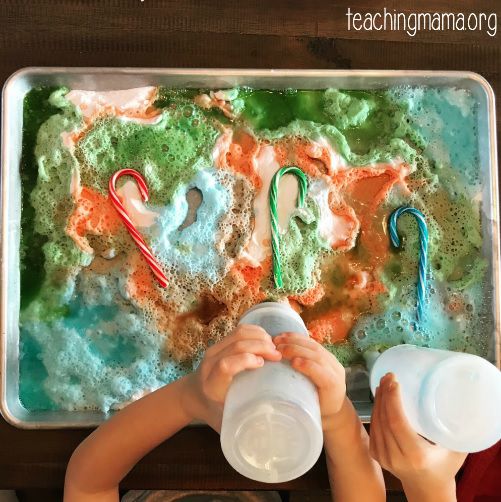
What would be more fun than fizzing activities!? Combining candy canes and fizzing activity gives a ton of fun and excitement for the children to start up with!! With a few supplies and instructions your kids are going to have a blast! What are those magical ingredients that make our yummy candy canes fizz in no time!? Check out here to know the reasons and science behind it: Fizzy Candy Canes Science Experiment
8. How strong is a candy cane Science Experiment?
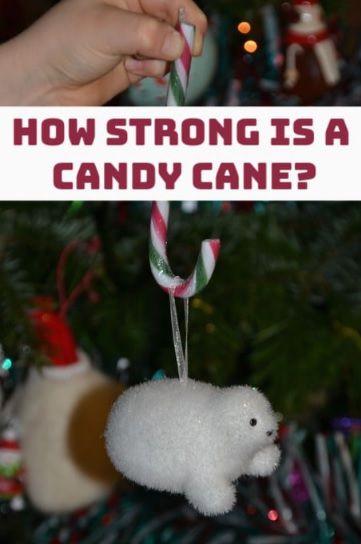
Looking for an activity that reveals the strength of the candy canes? Pick up this awesome experiment to learn what actually proves the strength of the candy canes. I did this experiment with my kids and had a blast with this fascinating experiment. I wish you will also try to experience the magical results of the experiment.
Get the instructions and supplies here before you start the experiment to have hassle free experience: How strong is a candy cane Science Experiment?
9. Disappearing Candy Cane science experiment
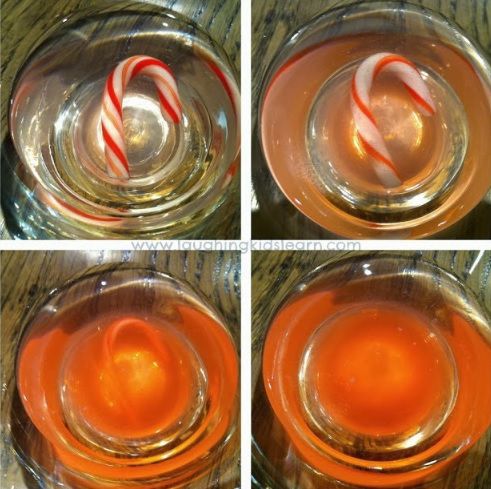
Grab a handful of candy canes to make them disappear but this time it is not in our stomach…hahahaha! Yes, fascinate your kids with this amazing experiment and you will not believe how easy it is to set up and how easy to perform. There are many variations to this awesome experiment!
Find the amazing science activity here: Disappearing Candy Cane science experiment
10. Dancing Candy Canes Science Experiments
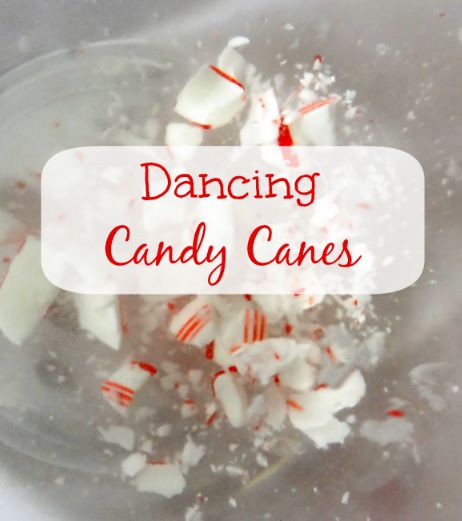
Experience the magical science of dancing candy canes in an innovative and creative way right before your eyes! All the age group children will enjoy the trick behind dancing process of candy canes and the experiment is entertaining and engage the kids with thinking and learning the concepts. It just took 3-5 minutes to enjoy the fascinating results!!
Want to get the complete details of the experiment in detail!? Click Dancing Candy Canes Science Experiments
11. Candy Cane Goo Oobleck Science Experiment

Enjoy the fascinating properties of oobleck, which remains solid right now and changes to liquid the next moment!! Best making hands-on science experiment or a good demonstration or lesson for making predictions. To conduct this awesome experiment, we only need 3-5 supplies with simple instructions. Have a look at this cool fun science experiment to get the complete details: Candy Cane Goo Oobleck Science Experiment
12. Candy Cane Slime Christmas Science Experiment
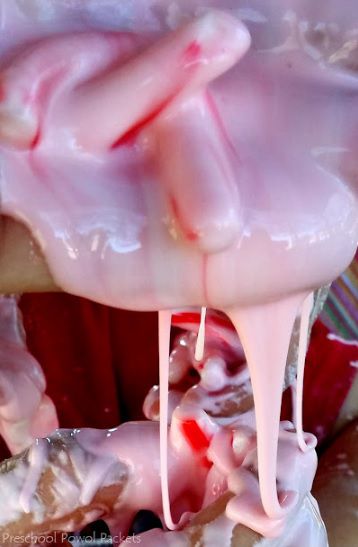
Here we have come up with a delightful recipe that can be made with our simple homemade supplies. Kids love towards candy canes and making slime brings a lot more interest to investigate the experiment. Also, this experiment is perfect as a fun science STEM activity.
If you are interested to do this Christmas science activity, then click on Candy Cane Slime Christmas Science Experiment
13. Mint Fireworks Candy Cane Science Experiment
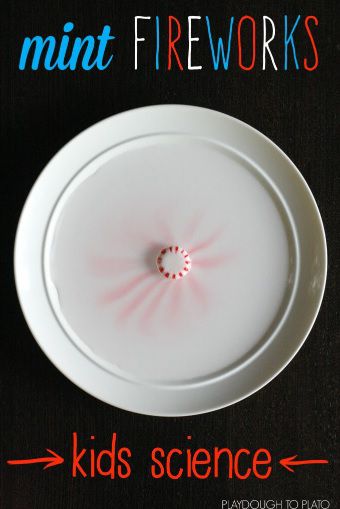
Engage and entertain your children with this amazing firework activity!! It is also fascinating to watch and observe the changes happening during the experiment and it is exciting for us too to hear the curious questions from the children about the experiment results!! Kids will have a great opportunity to try the experiment in a variety of ways which improves their research skills.
Here is the easy, simple, and fun Christmas science experiment, have a look: Mint Fireworks Candy Cane Science Experiment
14. Science Experiment with Poinsettias and Candy Canes
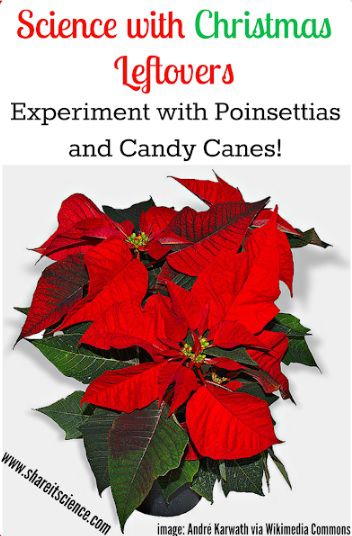
Without candy canes and poinsettias, there is no Christmas celebration!! But what we do with the left over candy canes and poinsettias during Christmas season? We have an idea to make use of our left overs to perform some simple science experiments to learn Christmas science. Of course, you can perform this experiment any time of the year.
Get more details in the disclosure page of the experiment here: Science Experiment with Poinsettias and Candy Canes
15. Candy Science – The Chemistry behind Candy Making with Delicious Recipes
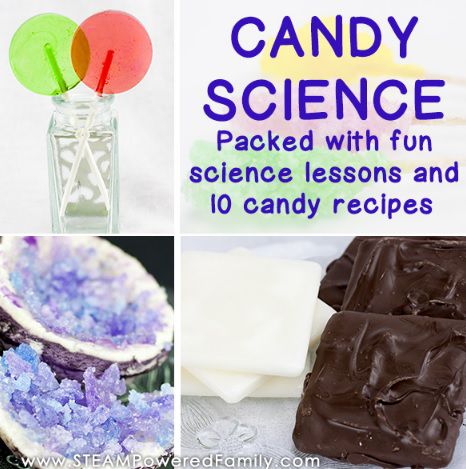
Teach your children science with easy and hands-on learning!! Perfect and fantastic experiments from pre-schoolers to high schoolers. Older kids will definitely learn the complex and challenging chemistry concepts behind making candies. Each and every experiment encompasses an informational passage about the candy science.
Try this candy science right from your home or school with easy instructions mentioned here: Candy Science – The Chemistry behind Candy Making with Delicious Recipes
Candy canes are the favorite sweet candies for the kids all over the world!! It is more exciting for them to do some simple, super cool activities in a wonderful way using candy canes through which kids are even more excited to dig into!! But before we step into the actual procedures it is better to go through the complete description of the experiment mentioned in the affiliated links at the bottom of each and every science experiment. Also, it is equally important to have an appropriate adult supervision at all times while kids performing these science experiments though they are easy, safe, and without any messy work. Investigate safe, play safe, be safe, and learn safe!! Happy Experimenting!!
Leave a Reply Cancel Reply
Your email address will not be published. Required fields are marked *
Name *
Email *
Add Comment *
Save my name, email, and website in this browser for the next time I comment.
Post Comment

Dissolving Candy Canes Experiment and Worksheets
Sharing is caring!

We love conducting experiments with candy, so it’s no surprise that we decided to try dissolving candy canes in various liquids. Our liquids of choice for dissolving candy canes were cold water, hot water, oil, vinegar, vinegar and baking soda, and water and Alka-Seltzer.

We did a similar experiment with candy pumpkins .
Candy experiments are also a good opportunity to teach our kids to read nutrition labels! So, before starting the chemistry part of this experiment, ask your kids to read the nutrition label on the candy canes. If they aren’t familiar with reading these labels, we have an activity for that ! Note the ingredients on our candy cane box (mini candy canes) – Research the coloring red 40.
So, these little treats are filled with sugar and dye, but that’s all the more reason to dissolve the candy canes!

Introduce this experiment by watching a video about how candy canes are made. Here’s one from Insider. Redstone Foods has this history behind the origin of candy canes.
Vocabulary Related to Our Dissolving Candy Cane Experiment
Since we will be dissolving candy canes to test their solubility, we made a list of chemistry vocabulary list, which included molecules, solvents, solutes, solution, reactants. The free printable accompanying this activity incorporates all of the vocabulary listed in this post.
- When the vinegar and baking soda are mixed together it forms a solution. A solution is a mixture that has a solute and a solvent. The solute is what is being dissolved. The solvent is what the solute is dissolved into.
- When we set up this experiment, as the vinegar and baking soda are mixed together it forms a solution. A solution is a mixture that has a solute and a solvent. The solute is what is being dissolved – the baking soda. The solvent is what the solute is dissolved into – the vinegar.
- When we are dissolving candy canes in the baking soda and vinegar solution, the candy cane becomes a solute because we are dissolving the candy cane in the vinegar and baking soda solution.
- Solubility is the ability of a substance to dissolve in a liquid. Think about this activity, discuss with your student what they think will happen when the candy cane is dissolved in warm water, and what do they think will happen when the candy cane is dissolved in oil? In which liquid do they think the candy cane will dissolve faster and more completely? Does the candy cane have better solubility in the warm water versus the oil? We’ll find out!
Information About Chemical Reactions
A chemical reaction is when substances change into new substances. This happens when the molecules of the original substances rearrange and combine in different ways.
The substances you start with in a chemical reaction are called reactants . For example, if you mix baking soda and vinegar, each of them is a reactant.
After the reaction happens, you get something different called products . In the baking soda and vinegar example, the reaction produces carbon dioxide gas, water, and other substances.

Sometimes, you can see signs that a chemical reaction has taken place. These signs include:
- Bubbles: Gas is produced. When baking soda and vinegar are mixed, you see the carbon dioxide bubbles.
- Color Change: The mixture changes color.
- Temperature Change: The mixture gets warmer or cooler. Check out this activity that produces an endothermic chemical reaction .
- New Smell: A different smell appears.
In many cases, chemical reactions create products that cannot easily change back into the original reactants. For example, when you bake a cake, the ingredients change into a cake, and you can’t turn it back into flour, eggs, and sugar.
- Chemical reactions and chemical changes almost always involve energy changes. During these reactions and changes, bonds are being made and/or being broken; these processes involve energy.
- Both of these words have Greek origins. Exo means out, Endo means within, and thermic is from the Greek word therme , which means heat.
- In an endothermic chemical reaction more energy is released into the surrounding area than is absorbed.
- In an exothermic chemical reaction, more energy is released into the surrounding area than is absorbed
Dissolving candy canes in water and Alka Seltzer is shown in the video below.
We have this information in the free printable you can use alongside this activity. Request it below.

Request the Dissolving Candy Canes Free Printable Lesson
Dissolving candy canes experiment – experiment set-up & pre-experiment discussion.
We discussed what we hypothesized would happen:
- Which mixture would dissolve the candy cane first.
- Which candy cane would dissolve the slowest.
- Would there be a candy cane that dissolved (almost) completely?
- Do you think bubbles will form on any of the candy canes?
Use the worksheets in the printable pack to complete the questions.
Review the vocabulary pages for the words solute, solution, solvent, products, reactants, and chemical reaction
Smell each liquid. How does it smell? (At this point, do not add the baking soda or Alka Seltzer.)
Materials Needed:
Here is the list of items needed for this experiment. You may opt to add more liquids to act as the solvents. We used hot water, cool water, vinegar, and cooking oil. You could add hydrogen peroxide, rubbing alcohol, or a clear soda/soft drink. Adult supervision is required if using rubbing alcohol and/or hydrogen peroxide.
Materials List:
- Safety glasses
- Candy canes
- Baking soda
- White vinegar
- Cooking oil
- Hot water – almost boiling
- Alka Seltzer tablets
- Glasses or mason jars
- Marker and paper to make labels
Dissolving Candy Cane Instructions:
- Put on the safety glasses.
- Fill each cup with same amount of liquid. We used 12 ounces of each liquid.
- Have alka seltzer and baking soda at the ready.
- Place label in front of each jar/cup so you know what’s in each container.
- Place one candy cane in each cup.
- Add the baking soda to the vinegar.
- Add the Alka Seltzer to one of the cups with warm water
- Observe and record results on the worksheets starting with the time the candy cane is first placed in the liquid.

You can see our experiment photos below along with the explanation of what happened in each container.
Dissolving Candy Canes Experiment in Pictures
Here are our step-by-step photos.

What Happened in this Experiment?
Solubility in Our Experiment
Our candy cane experiment explored how a candy cane(the solute) dissolves in different liquids (the solvent): warm water, cold water, Alka-Seltzer and water, vinegar, and vinegar mixed with baking soda. Each liquid has different properties that affect the solubility of the candy cane.
Remember, solubility is the ability of a substance (in this activity, the candy cane) to dissolve in a liquid (in this activity, the water, oil, vinegar, etc.)
Here is what was happening in each container:
Warm water has higher energy than cold water because the heat causes water molecules to move faster, increasing the chances of collisions with the candy cane molecules. As these molecules collide, they work to break the bonds holding the sugar and flavoring together in the candy cane.
This causes the candy cane to dissolve faster in the water and demonstrates a high solubility of the candy cane in warm water. Remember, solubility is the ability of a substance to dissolve in a liquid.
Cold water molecules move more slowly than warm water molecules. This slower movement results in fewer collisions with the candy cane molecules, making it harder for them to break apart. Therefore, the candy cane dissolves more slowly in cold water, which means it has lower solubility compared to warm water.
Alka-Seltzer and Water
When we mix Alka-Seltzer with water, a chemical reaction occurs that produces carbon dioxide gas. The bubbles created during this reaction agitate the solution, increasing the movement of both the water and candy cane molecules. This mixing helps to break the bonds in the candy cane, which makes it dissolve faster. This means it has higher solubility.
To best understand what happened with the candy cane placed in the cooking oil, we need to talk about polarity. We have a detailed lesson on the properties of water , in which we discuss polarity that you might want to use as a follow-up to this activity.
A water molecule consists of two hydrogen atoms and one oxygen atom. It has two ends, and the two positively charged hydrogen atoms at one end and the negatively charged oxygen atom at the other end give the molecule two poles.
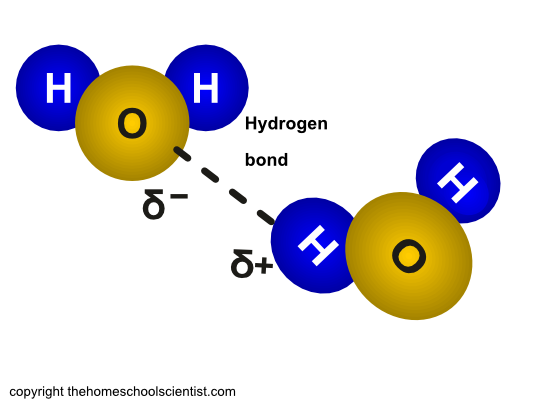
This combination of atoms makes water a polar molecule. Polar molecules have a negative side and a positive side. When we mix water and oil, what happens? They don’t mix or they repel each other. This is because oil has nonpolar molecules. This means they have a more even distribution of charge. (Unlike water that is positively charged on one end and negatively charged on the other.)
In a nonpolar bond, atoms share electrons equally, thus there is no partial positive or negative charge between the atoms.
Polar and nonpolar molecules tend to not be attracted to each other. In other words, polar and nonpolar molecules repel each other.
The sugar in candy canes is glucose and it is polar. In the illustration here the O-H (oxygen-hydrogen) bonds, the oxygen bonds are more negative than the hydrogen. This causes a negative charge on the oxygen parts and a positive charge on the hydrogen part. This makes the glucose molecule polar.
So, the polar glucose repels the nonpolar oil molecules. Instead of dissolving, the candy cane will simply sit in the oil without breaking down into smaller particles.

Vinegar is an acidic solution, which can increase the solubility of the candy cane. The acetic acid in vinegar interacts with the sugar molecules in the candy cane and breaks them down more effectively than water alone. Compare the water-only candy cane with the vinegar-only candy cane. Did the vinegar candy cane dissolve more quickly than the candy cane in water? The vinegar does not dissolve the candy cane more quickly, which means the candy cane has a higher solubility in water.
Vinegar and Baking Soda
In this mixture, the chemical reaction between vinegar and baking soda creates a lot of bubbles because when the acid in the vinegar interacts with the baking soda, carbon dioxide gas is created. We see this gas in the form of bubbles. The fizzing creates mixing in the liquid, which helps to break apart the candy cane more quickly. This shows us how a chemical reaction and physical process demonstrate that the combined effects of chemical reactions and physical agitation can lead to increased solubility.
Three factors played a role in how quickly the candy cane dissolved:
- Temperature: Higher temperatures increase molecular movement, which speeds up the dissolving process.
- Agitation: Stirring or shaking the liquid can help mix the candy cane with the liquid, leading to faster dissolving.
- Chemical Reactions: Some liquids, like vinegar, can chemically interact with the candy, speeding up the dissolving process.
I hold a master’s degree in child development and early education and am working on a post-baccalaureate in biology. I spent 15 years working for a biotechnology company developing IT systems in DNA testing laboratories across the US. I taught K4 in a private school, homeschooled my children, and have taught on the mission field in southern Asia. For 4 years, I served on our state’s FIRST Lego League tournament Board and served as the Judging Director. I own thehomeschoolscientist and also write a regular science column for Homeschooling Today Magazine. You’ll also find my writings on the CTCMath blog. Through this site, I have authored over 50 math and science resources.
- Skip to primary navigation
- Skip to main content
- Skip to primary sidebar

- FREE Experiments
- Kitchen Science
- Climate Change
- Egg Experiments
- Fairy Tale Science
- Edible Science
- Human Health
- Inspirational Women
- Forces and Motion
- Science Fair Projects
- STEM Challenges
- Science Sparks Books
- Contact Science Sparks
- Science Resources for Home and School
Candy Cane Experiment – dissolving candy canes
December 12, 2022 By Emma Vanstone 1 Comment
This dissolving candy canes activity is a great science activity for before Christmas when the festivities are in full swing or after Christmas to use up any leftover candy canes .
The idea is to place candy canes in different liquids to find where they melt the fastest. We used hot and cold water and vinegar, but different hot chocolate temperatures would also work well.
Dissolving candy canes is an excellent investigation for learning how to set up a fair test! This means you need to think about which variables you change and which you keep the same.
Controlled variables are things you keep the same. In this investigation, the controlled variables are:
- size of candy cane
- time the candy cane is in the liquid
- amount of liquid used
The independent variable is the thing you change. In this experiment, the independent variable is the liquid in which the candy canes are sat.
The dependent variable is the thing you measure. In this investigation, the time it takes for the candy cane to dissolve is measured.
You’ll need the following:
Three containers of the same size
Set up your containers. Take care with the hot water.
Add a candy cane to each container the same way up.
Observe each candy cane at 5-minute intervals ( can you design a table to record your observations? )
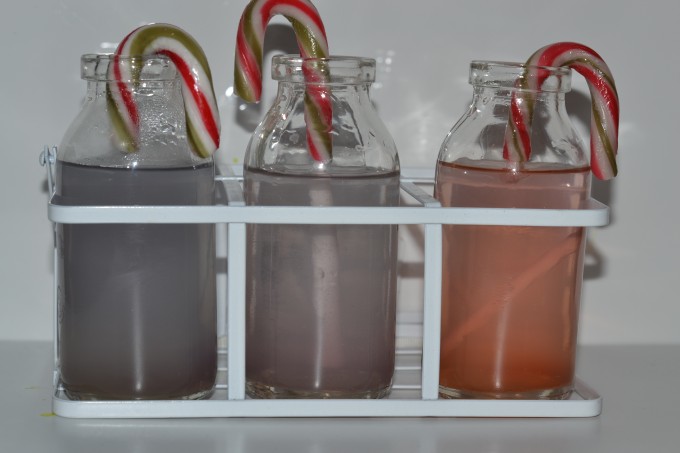
The photo below shows our final results after 20 minutes.
Vinegar is on the left, cold water is in the middle, and hot water is on the right.
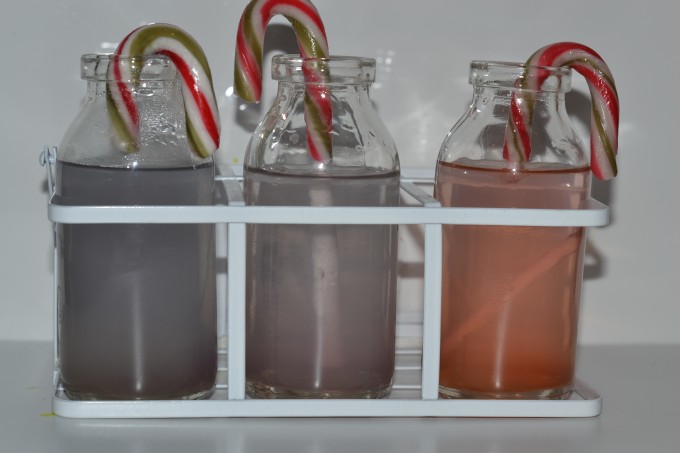
You can see that the vinegar completely dissolved the submerged candy cane, the cold water just dissolved the outer layer and the hot water dissolved past the outer layer making the submerged section break off.
The thing we found most interesting was that the hot water turned red, and the vinegar and cold water turned grey.
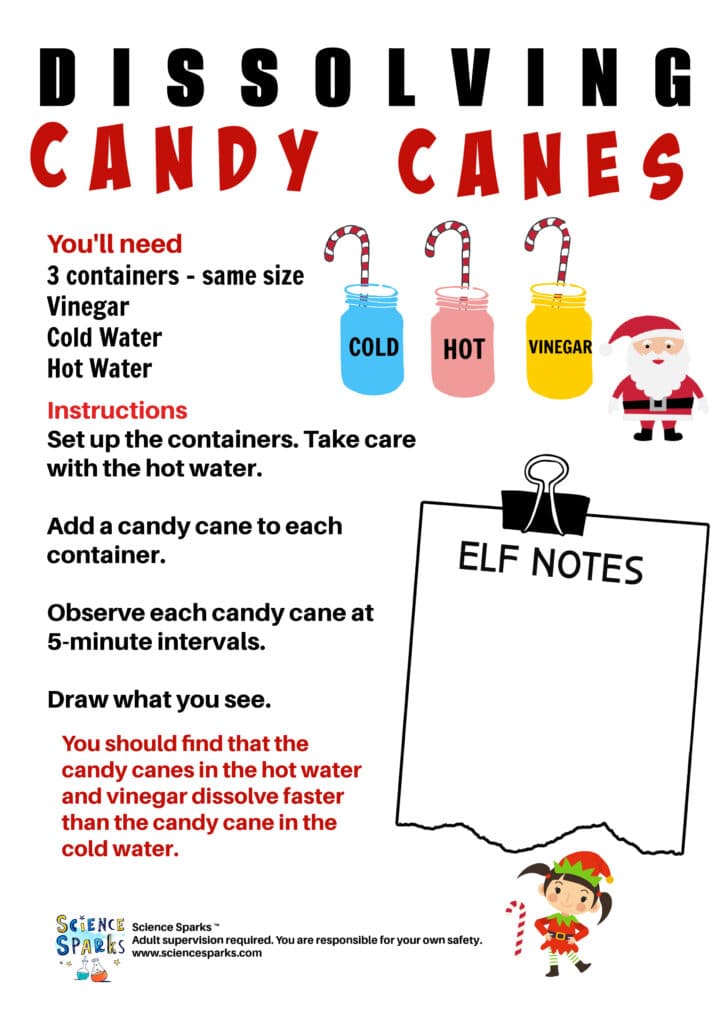
Record the results on the handy dissolving candy canes instruction sheet below.
More Candy Cane Experiments
Find out how strong a candy cane is by hanging decorations from the end.
Inspiration Laboratories has a great candy cane activity using different water temperatures that would be great to try too.

More Christmas Science Experiments
Try one of my festive candy experiments ! These include building marshmallow snowmen, making sugar crystal lollies and making delicious peppermint candies.
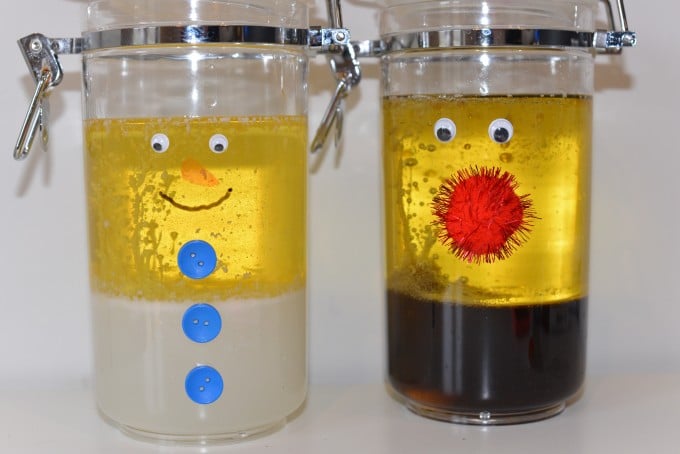
Try these fun Christmas Lava Lamps . We made ours snowman and reindeer themed, but you could make anything you wanted! How about an elf lava lamp?
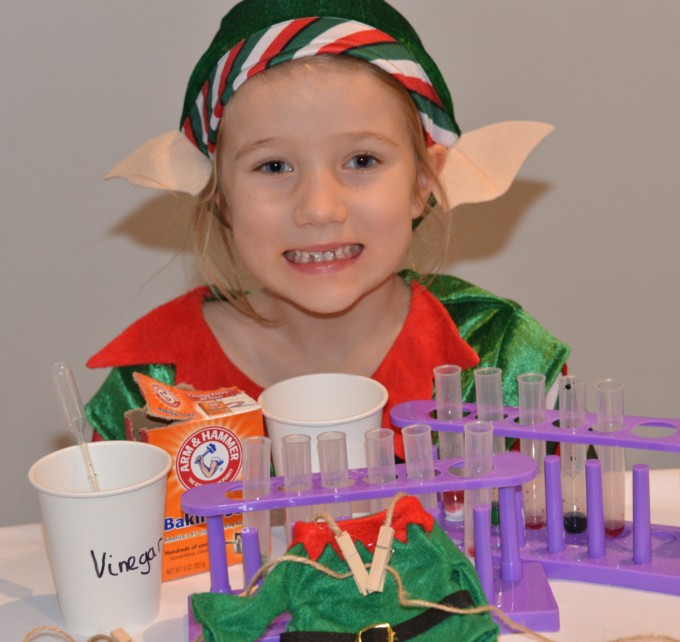
Set up a Fizzy Elf Lab and determine what happens when baking soda and vinegar react.
How about making a fun Frosty the Snowman ? Making frost on a can is a brilliant way to find out how salt makes a mixture of water and ice extra cold!
I also have a FREE Christmas Science eBook full of easy Christmas science experiments you might like!

Amazon.com Widgets
Last Updated on December 12, 2022 by Emma Vanstone
Safety Notice
Science Sparks ( Wild Sparks Enterprises Ltd ) are not liable for the actions of activity of any person who uses the information in this resource or in any of the suggested further resources. Science Sparks assume no liability with regard to injuries or damage to property that may occur as a result of using the information and carrying out the practical activities contained in this resource or in any of the suggested further resources.
These activities are designed to be carried out by children working with a parent, guardian or other appropriate adult. The adult involved is fully responsible for ensuring that the activities are carried out safely.
Reader Interactions
December 24, 2015 at 1:37 pm
Your candy canes have green on them. The cold jar candy cane looks like thick red with thin green stripes while the others more even. The mixing of more green than red may be the cause of the grey water.
Also, the cold may not dissolve the green as quickly. I cannot tell if there is still green on the candy cane still in the cold water. If this were the case, then the cold would have more red.
Just my hypothesis. 😀
Leave a Reply Cancel reply
Your email address will not be published. Required fields are marked *

12 Candy Cane Science Experiments
Candy canes are everywhere this time of year. Do you decorate with them? Do you eat them? What do you do with the leftovers? Try these candy cane science experiments with your kids this season.
Candy Cane Science Experiments
Dissolving candy canes are probably the most popular candy cane science experiment. Check out our Dissolving Candy Cane Science Experiment and test how fast will candy canes dissolve in different temperatures of water? We used mini candy canes for this. Be sure to download the free printable to record your data.
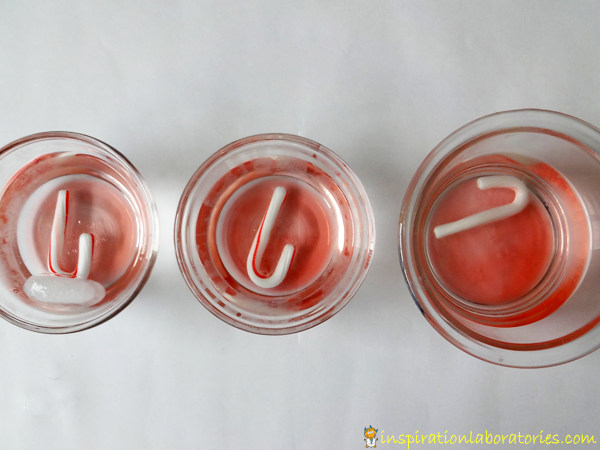
A Mom With A Lesson Plan did a similar Christmas science experiment with large candy canes.
Test how candy canes dissolve in different liquids like Science Sparks did. Besides water, what else would you use? Try vinegar, milk, fruit juice, oil, etc. Does the type of liquid make a difference in how the candy canes dissolve?
Dancing Candy Canes – Use the baking soda and vinegar reaction to make candy cane pieces dance.
Design an experiment to test how strong is a candy cane ? Science Sparks has the details.
Learn how to bend your candy canes with this science idea from Preschool Powol Packets .
Turn your candy canes or peppermints into different shaped ornaments by melting them in the oven. Get the instructions at Left Brain Craft Brain .
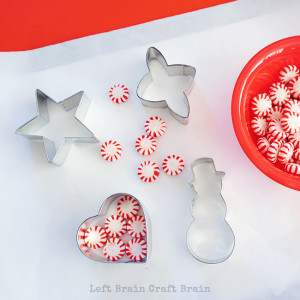
Make peppermint fireworks – This is a twist on the dissolving candy cane experiment. When you use peppermints, you’ll see what looks like fireworks in the bowl. Playdough to Plato shows us how.
Peppermint Oobleck – Use peppermints or candy canes to make this fun red and white striped sensory play from Little Bins for Little Hands .
Hot Cocoa Science – Adding candy canes (among other things) to the hot cocoa makes for a fun way to incorporate some science to the hot cocoa making and drinking by practicing observation skills, measuring, making predictions, and investigating.
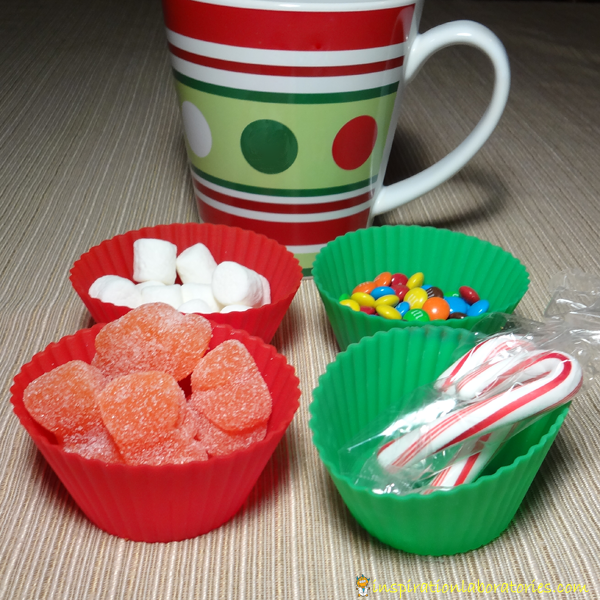
Fizzing Candy Canes – For a festive twist on a standard baking soda and vinegar exploration, add some candy canes. Find out what happens at Teaching Mama .
Candy Cane Sensory Bottle – Lemon Lime Adventures created this great sensory bottle for an 18 month sibling while her older brothers were conducting a dissolving candy cane experiment. Scroll to the bottom of the post to check it out.
Do you have any candy cane science experiments to add to our list? Leave a link in the comments or share on our Facebook page !
Subscribe to the Inspiration Laboratories newsletter. Each issue has exclusive hands-on science explorations for children, a recap of our latest activities, and special resources selected just for you.
This post was originally published on November 23, 2015.
Leave a Reply Cancel reply
Your email address will not be published. Required fields are marked *
Save my name, email, and website in this browser for the next time I comment.
© 2024 Inspiration Laboratories

Easy Dissolving Candy Canes Experiment for Kids
Candy canes are not only great to eat, but they are also fun to use as part of a winter STEM activity! Your kids will learn what liquid dissolves this holiday sweets the fastest in this dissolving candy canes experiment.
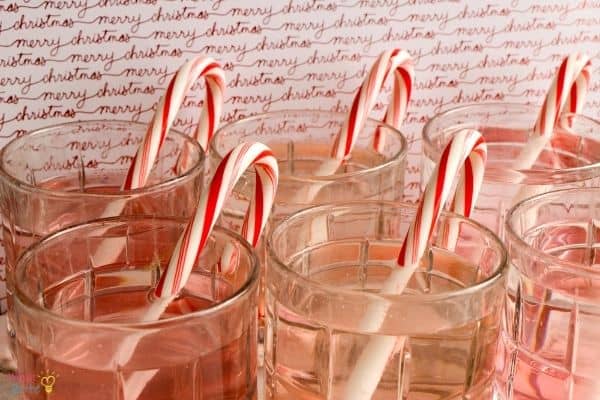
We are having so much fun with candy canes this holiday season! First, we did the bending candy cane experiment , which made us look like we had superpowers and could magically bend candy canes without breaking them. Then we tested our problem-solving skills with the candy cane bridge challenge and helped a bunch of animals cross the bridge.
Now, we are going to answer the question of what dissolves candy cane the fastest. Not only are we going to test if the temperature of the water is a factor (like we did in the dissolving peppermint science experiment ), we are also going to see if adding sugar and salt to the water makes candy canes dissolve faster than just pure water.
Dissolving Candy Cane Science Experiment
Materials: .
- 6 cups water
- ½ cup sugar, divided
- ½ cup salt, divided
- 6 candy canes
- Free dissolving candy cane science experiment worksheet (you can also fill out the form at the end of the post)
Instructions:
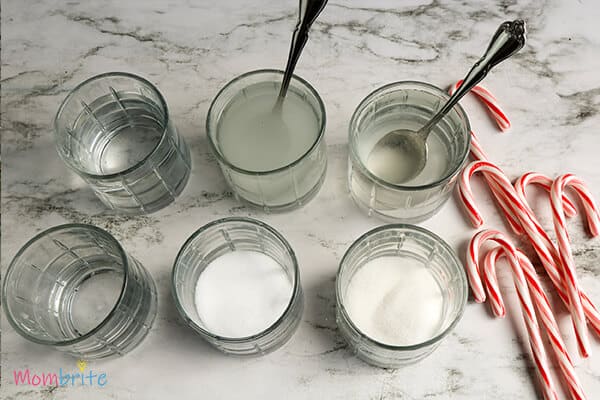
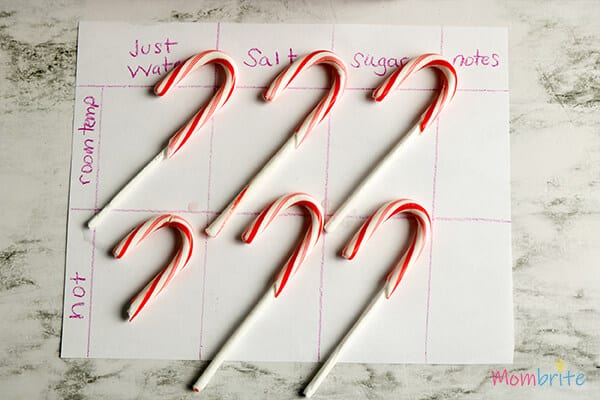
- Place 1 cup of water into three different cups. Into one cup, add ¼ cup sugar, stirring until it is dissolved. Into the second cup, add ¼ cup salt, stirring until dissolved.
2. Heat the remaining 3 cups of water until hot.
3. Place 1 cup of hot water into three different cups. Into one cup, add ¼ cup sugar, stirring until it is dissolved. Into the second cup, add ¼ cup salt, stirring until dissolved.
4. Place one unwrapped candy cane into each cup of water. Set a timer for 2 minutes.
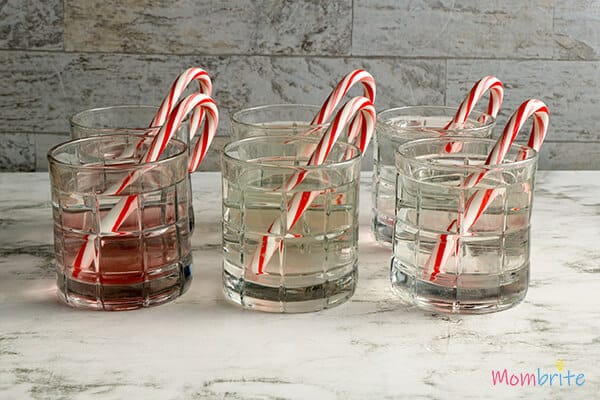
5. When the timer goes off, check the candy canes and make note of which have changed.
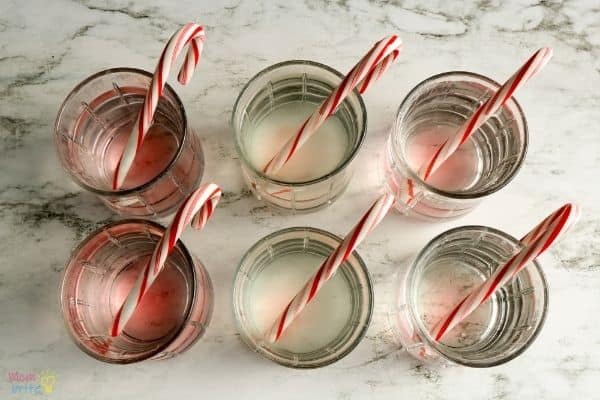
6. Continue checking the candy canes every 2 to 5 minutes, making note of the time and changes.

7. Take out the candy canes from the liquids and discuss which liquids caused the candy canes to dissolve faster/slower and why.
Science Behind the Dissolving Candy Cane Experiment
Candy canes are essentially made of sugar, and sugar is made of large molecules called sucrose. These sugar molecules are attracted to each other and held together by the attraction between the polar areas of the sucrose.
However, when you place sugar cane in water, the polar areas of the sugar molecules become attracted to the polar areas of the water molecules. When this attraction is powerful enough to overcome the attraction of the sucrose molecules to each other, the sugar molecules will separate and dissolve.
In this experiment, we also tested whether sugar dissolves faster in hot water versus room temperature water. By the looks of the candy cane in pure hot water, it was obvious that sugar dissolves faster in hot water.
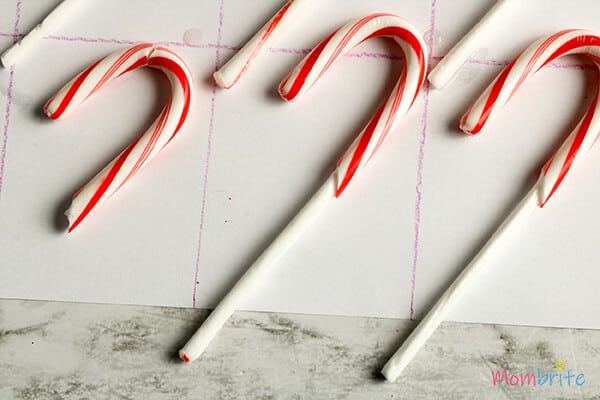
This is because hot water has more energy than room temperature water. In hot water, the water molecules have more energy and move faster, causing them to bump up against the sugar molecules more often.
How about the effect of salt and sugar on how much sugar is dissolved? While salt and sugar are made of different molecules, you can see that they produced similar results when it comes to dissolving the candy cane. In both room temperature water and hot water, the salt and the sugar both seemed to have slowed down the sugar from dissolving.
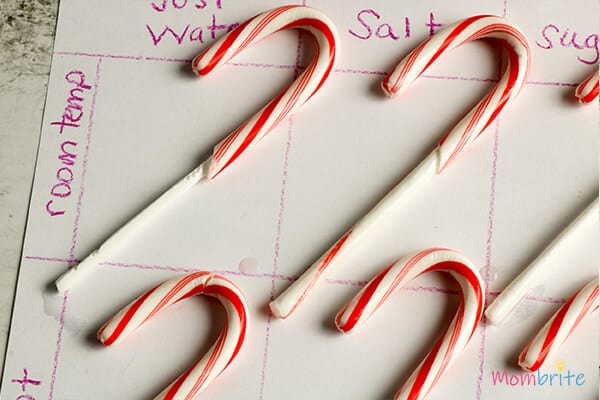
This is because the salt and sugar molecules in the water are competing with the sucrose from the candy cane for the water molecules. As a result, not as much sugar molecules from the candy cane was able to separate and reattach to the water molecules.
I didn’t get a chance to create a worksheet when we did this experiment, but I made one later! To get your free worksheet where your child can record his observations, just fill out the form below. I also included a blank worksheet in case you want to repeat this experiment with other liquids such as oil, vinegar, and soda!
About The Author
2 thoughts on “easy dissolving candy canes experiment for kids”.
I would love the form to use with my Kindergarten class!
awesome! simply subscribe and you can get the form delivered to your inbox 🙂
Leave a Comment Cancel Reply
Your email address will not be published. Required fields are marked *
Save my name, email, and website in this browser for the next time I comment.
GET OUR LATEST UPDATES!

Fizzy Candy Canes: Christmas STEM
The holidays are the perfect time to mix festive fun with hands-on learning, and this Fizzy Candy Cane Christmas STEM activity is a hit with kids! My kids couldn’t get enough of the bubbling reactions and colorful fizz, and they loved experimenting with different ways to make the candy canes “disappear.” It’s a simple setup, but the results are magical, making it a perfect holiday activity that combines science and play.
This activity is the perfect mix of festive and educational. It encourages curiosity, experimentation, and excitement while teaching kids about chemical reactions. Plus, the colorful fizz and bubbling action are so satisfying to watch—it’s like a science-themed holiday celebration!

Why You’ll Love This Christmas Science Experiment
You’ll love this experiment because it’s not just fun—it’s educational too! Kids get to explore basic chemistry concepts like reactions between baking soda and vinegar while adding a festive twist with candy canes and holiday colors. It’s quick to set up, keeps kids engaged, and adds a little extra sparkle to your holiday celebrations.
Materials You’ll Need:
- A tray (to contain the mess)
- Baking soda
- Food coloring (red and green)
- Eye droppers or pipettes
- Candy canes
- Cupcake tray (for mixing colored vinegar)
How to Set Up the Fizzy Candy Cane Experiment
1. prepare the tray.
Cover the bottom of the tray with a thick layer of baking soda. Lay the candy canes on top of the baking soda, arranging them however you like—straight, curved, or even spelling out a holiday word like “JOY.”

2. Prepare the Colored Vinegar
In a cupcake tray, mix vinegar with a few drops of food coloring. Use one section for red and another for green. Stir to combine, and set the tray aside with the eye droppers or pipettes.

3. Introduce the Experiment
Invite your kids to use the eye droppers to pick up the colored vinegar and squirt it over the candy canes and baking soda. Encourage them to start with small amounts and observe what happens.

4. Watch the Reaction
As the vinegar hits the baking soda, it will fizz and bubble, creating colorful, foamy reactions. The candy canes will slowly dissolve, adding an extra layer of fun as kids watch them “melt” away.

Tips for Exploration
- Encourage kids to mix colors and see what happens when red and green combine.
- Ask them to predict what will happen before they add the vinegar.
- Try varying the amount of vinegar to see how it changes the reaction.

Science Behind Fizzy Candy Cane Experiment
The science behind the fizzy candy cane experiment lies in the chemical reaction between baking soda (a base) and vinegar (an acid). When vinegar is added to the baking soda, it triggers a reaction that produces carbon dioxide gas. This gas forms bubbles, creating the fizzy, bubbling effect that kids find so exciting. The reaction occurs because vinegar contains acetic acid, which reacts with the sodium bicarbonate in baking soda to produce carbon dioxide, water, and sodium acetate. The candy canes dissolve into the mixture, adding a festive element while showing how different substances can interact in a chemical reaction. It’s a simple but effective way to introduce kids to basic chemistry concepts like acids, bases, and gas production!

This Fizzy Candy Cane Christmas STEM activity is a festive way to introduce kids to science while celebrating the holiday season. It’s hands-on, exciting, and educational—a perfect combination for curious little minds!
Play2Learn Toddler & Preschool Programs for Curious Toddlers
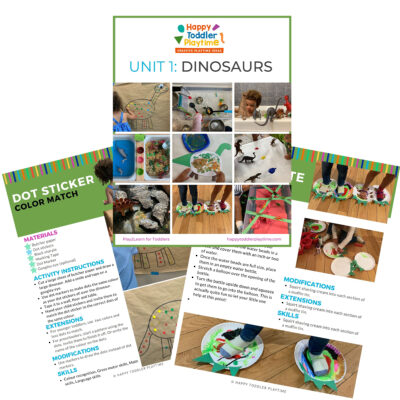
There is no limit to your toddler’s energy and curiosity. That energy and curiosity although a joy can be challenging at times. Their interest in just about everything around them is what makes them great learners. One and two year olds can soak up so much just from their senses!
But as a teacher or parent that thirst for learning can be exhausting. That is why I created this toddler and preschooler program. To help you get the most out of this time with your curious toddler without having to come up with creative ways to play and interact with them.
Play2Learn for Toddlers includes 20 Units for toddlers. Each 2-week toddler unit has 20 super easy to set up and engaging activities for toddlers 18 months to 3 years.
Play2Learn Preschool which includes 20 Units for preschoolers. Each 2-week preschoolers unit has 20 unique and easy to set up and engaging activities for preschoolers 3 years to 5 years. That’s over 800 learning activities for your toddler and preschooler at your fingertips! So many ideas you and your child will never be bored again!
These toddler and preschool lesson plans and activities will definitely keep you and your toddler and preschooler busy playing and learning!
Click here for more information: Play2Learn
Book: Exciting Sensory Bins for Curious Kids
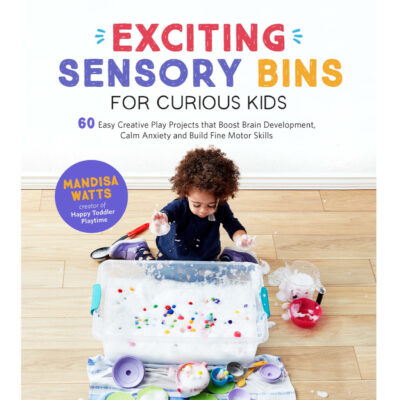
Did you know I wrote a book of sensory bins? Click here for more information Exciting Sensory Bin for Curious Kids . Or grab your copy at Amazon .
Boring afternoons are made exciting with awesome animal-based bins, like Salty Shark Bay or Yarn Farm. Pretend play bins like Birthday Cake Sensory Play or Bubble Tea Party encourage creativity and imagination. And your kids will have so much fun they won’t even know they’re getting smarter with STEAM (science, technology, engineering, art and math) activities like Sink or Float Soup, Magnetic Letter Hunt or Ice Cream Scoop and Count.
Designed for toddlers 18 months and up.
Book: Super STEAM Activity Book for Kids
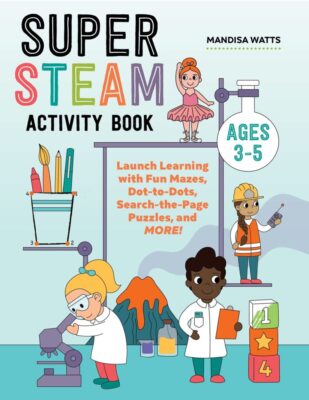
Learning all about science, technology, engineering, art, and math sets kids up for scholastic success―and it can be so much fun! Watch kids enjoy building STEAM skills as they color friendly fish, help water find its way to tree roots, solve math problems with mazes, and more.
Find out more and grab your copy here .
Designed for preschoolers 3 years old and up.
Book: Big Book of Riddles for Kids

Riddle me this: What’s an exciting way to practice critical thinking while having a blast? The Big Riddle Book for Kids , of course! From hilarious puns to tough brain teasers, kids can build problem-solving skills with hundreds of riddles tha. t show them how to think outside the box.
- 350 riddles for kids —Have hours of fun with riddles, puns and jokes, and math and logic puzzles that’ll get their wheels turning!
- Level up their skills —Riddles get trickier as kids progress through the book, challenging them as they get better at solving puzzles!
- Double-check their work —Kids can check their answers in the back of the book with a handy answer key.
Help children expand their minds while having fun with this puzzle book for kids!
Designed for kids ages 6 years old and up.
TV Show: Curious Crafting
I’m so excited to share my crafting TV show Curious Crafting which launched in July 2022 on TVOkids and TVOkids YouTube ! Season 2 aired in August 2023! My show was also nominated in 2023 for Best Live Action Preschool Series by the Youth Media Alliance Awards of Excellence.
Curious Crafting Season 1 is also now airing in Australia on ABC ! Watch it here !
Set in the ultimate crafting space, Curious Crafting is a short form pre-school age series about the joy of making crafts. I lead a rotating cast of adorable little preschoolers (including my own) making magic out of common household objects.
In each episode we transform recycled items into magical crafts like a milk carton school bus, paper bag puppet or cotton pad turtle. The crafters learn and laugh their way through each activity while demonstrating what their young imaginations can create.
Curious Crafting shares the adventure and joy of making art with takeaway lessons for creating crafts at home.
This show designed for toddlers and preschoolers 2.5 years old and up.
Filed Under:
- Indoor Activities
Other Posts You May Like...

Free Printable 2025 New Year's Eve Party Hat

Cork Painted Ornament Christmas Card

Folded Paper Christmas Tree Card

Bow Tie Pasta Wreath Christmas Card Craft
Review and rate this post cancel reply.
I love hearing from you! Submit your question or review here. Your email address will not be published. Required fields are marked*.
This site uses Akismet to reduce spam. Learn how your comment data is processed .
6 Winter and Christmas Science Projects for Kids
Dec. 16, 2024
Winter time and the holiday season provide a great environment for exciting and educational science experiments for the whole family to do. Check out these fun experiments that are designed to be engaging, low lift, and made with easy to find supplies. Children can explore the wonders of science while embracing the cold festive season.
Dissolving Candy Canes
This experiment invites you to discover how fast candy canes dissolve in different solutions.There are two different types of tests you can conduct with the candy canes. Either test how long it would take the candy canes to dissolve in each liquid, or test which liquid dissolved the candy canes the fastest. Make your predictions based on what you observed after you set up your materials.

Materials:
- 2 Cups Hot Water
- 2 Cups Room Temp Water
- 2 Cups Oil
- 2 Cups Vinegar
- 4 Candy Canes ( Small or Large)
- 4 glass cups ( or anything large enough to hold a candy cane)
- Something to write observations on
Procedure:
- Fill one container with the 2 cups of hot water. Repeat with each liquid.
- Put one candy cane in each container and hit start on the timer.
Observe what is happening with the candy canes. Write down the times it takes for each candy cane to dissolve completely.
Snowstorm in a Jar
Create a swirling snow storm but indoors with this engaging and fun experiment. Children of all ages will enjoy creating their very own snowstorm in a jar while learning about chemical reactions.
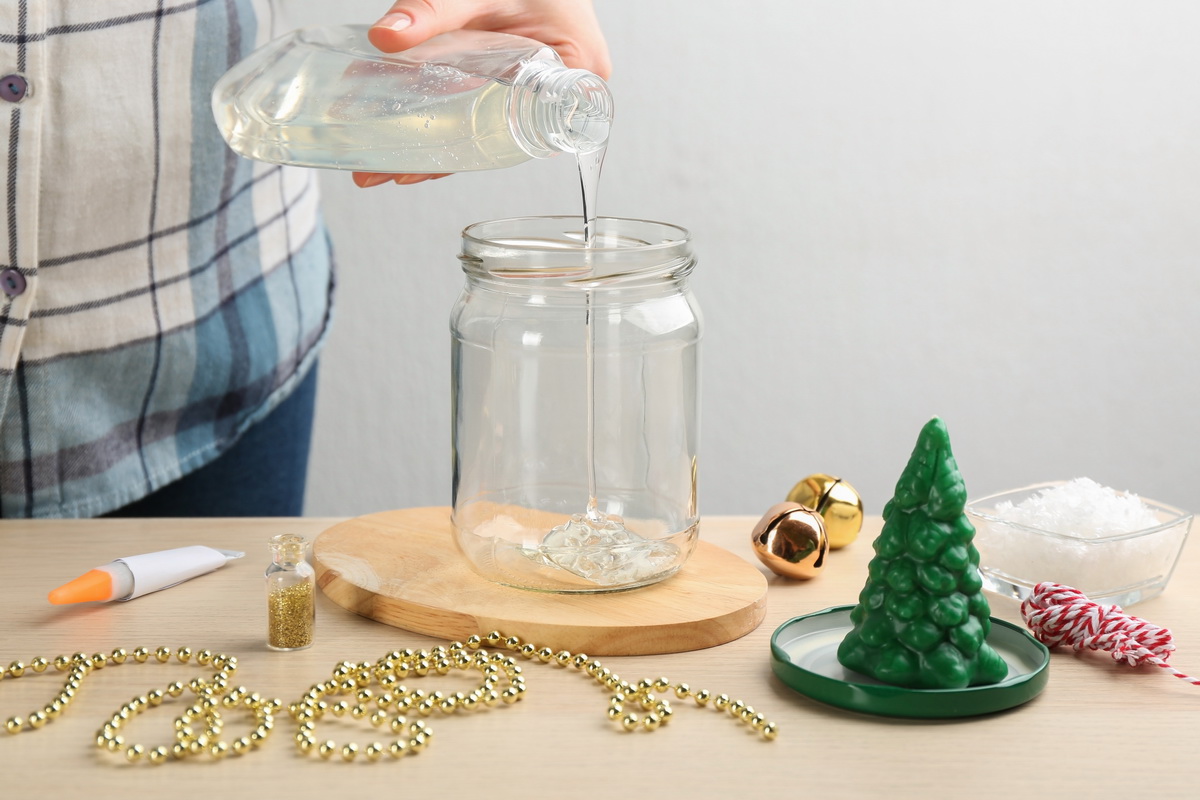
- White Paint
- Alka-Seltzer tablets
- Glitter (optional)
- Fill the jar halfway with baby oil.
- In the cup, mix water with a few drops of white paint to create a milky appearance, then pour into the jar until the jar is three-quarters full.
- Add glitter (optional).
- Break an Alka-Seltzer tablet into small pieces and drop them into the jar one piece at a time.
- Watch as a snowstorm appears inside the jar!
The alka-seltzer is reacting with the water causing it to release carbon dioxide. The gas creates bubbles that carry the water and glitter up , mimicking a snowstorm.
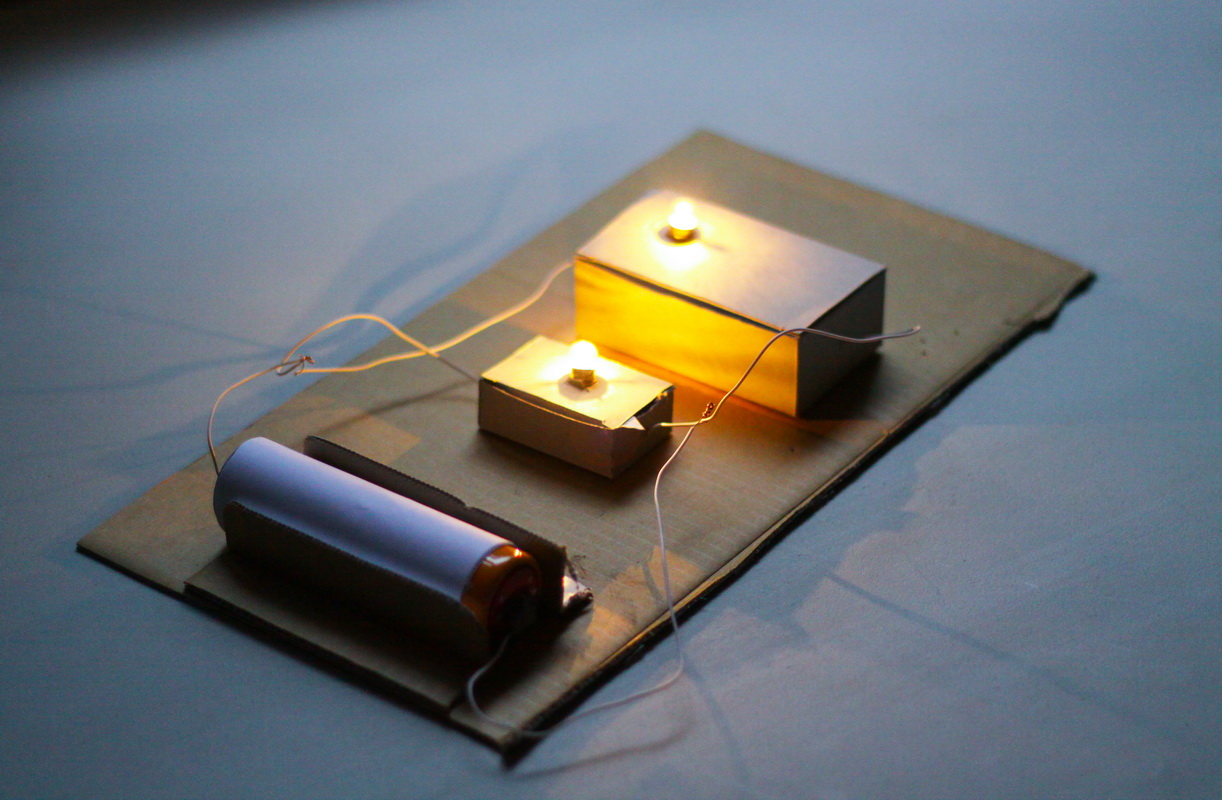
Christmas Light Circuit
Next up is a festive activity where children can learn about the basics of electrical circuits. Kids can light up their own mini Christmas lights while exploring the flow of electricity.
- Mini Christmas lights (LEDs)
- Batteries (AA)
- Electrical Tape
- Aluminum foil
- Prepare strips of aluminum foil.
- Attach one end of the foil to the + ( positive) side of the battery and the other end to the one leg of the LED.
- Connect a second piece of foil to the other LED leg to the - (negative) side of the battery.
- Make sure both connections are secure with electrical tape around each end.
- Watch the Christmas lights flow!

This experiment introduces the basics of electrical circuits, teaching children how electricity flows to power the lights. For an extension, you can create a sculpture or picture and use your lights to make a Christmas craft.
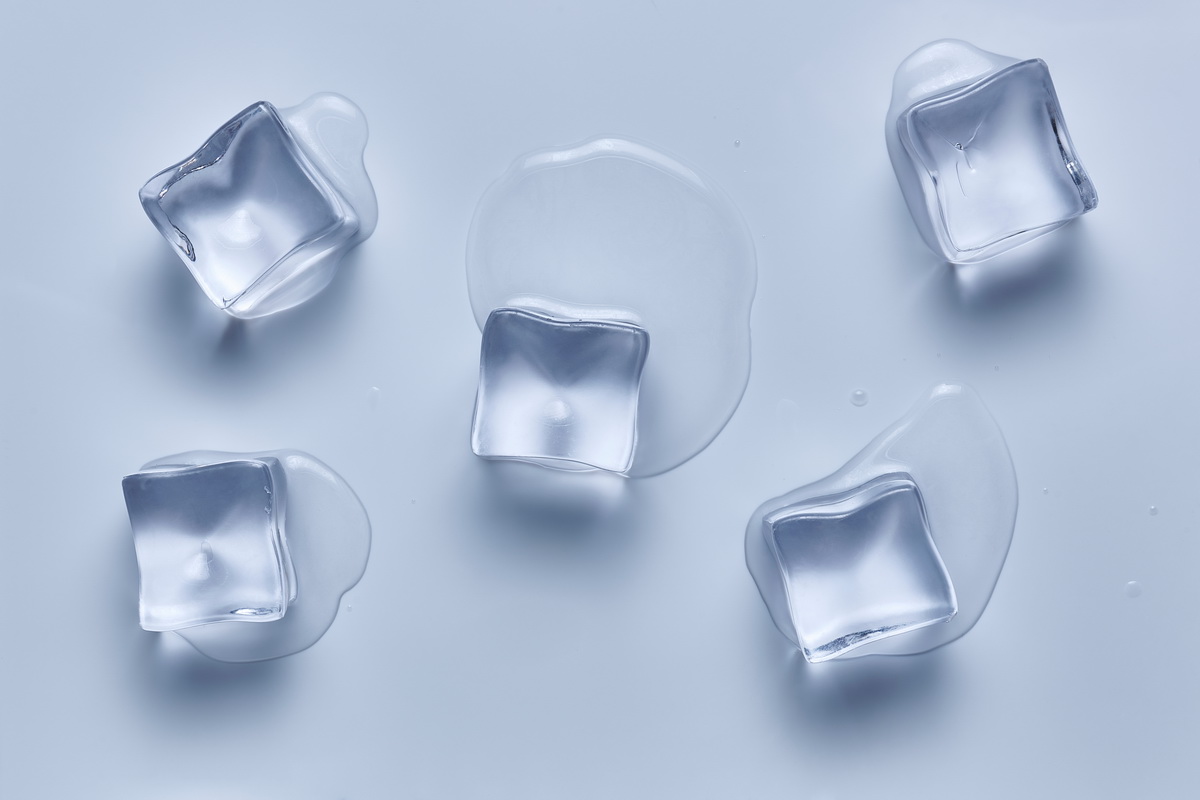
Melting Ice Race
In this fun and competitive experiment, children will discover how different substances affect the melting rate of ice.
- Baking Soda
- Plates (or bowls)
- Place one ice cube on each plate.
- Sprinkle salt on one ice cube, sugar on another ice cube, baking soda on the third ice cube and leave on without anything on them.
- For added fun have each child pick a substance they will root for to win.
- Time how long it takes for each ice cube to melt.
- Write down which one melted the ice the fastest and discuss why.
Salt lowers the freezing point of water causing the ice to melt faster. Sugar and baking soda also have the same effects but they are not as strong compared to the salt.
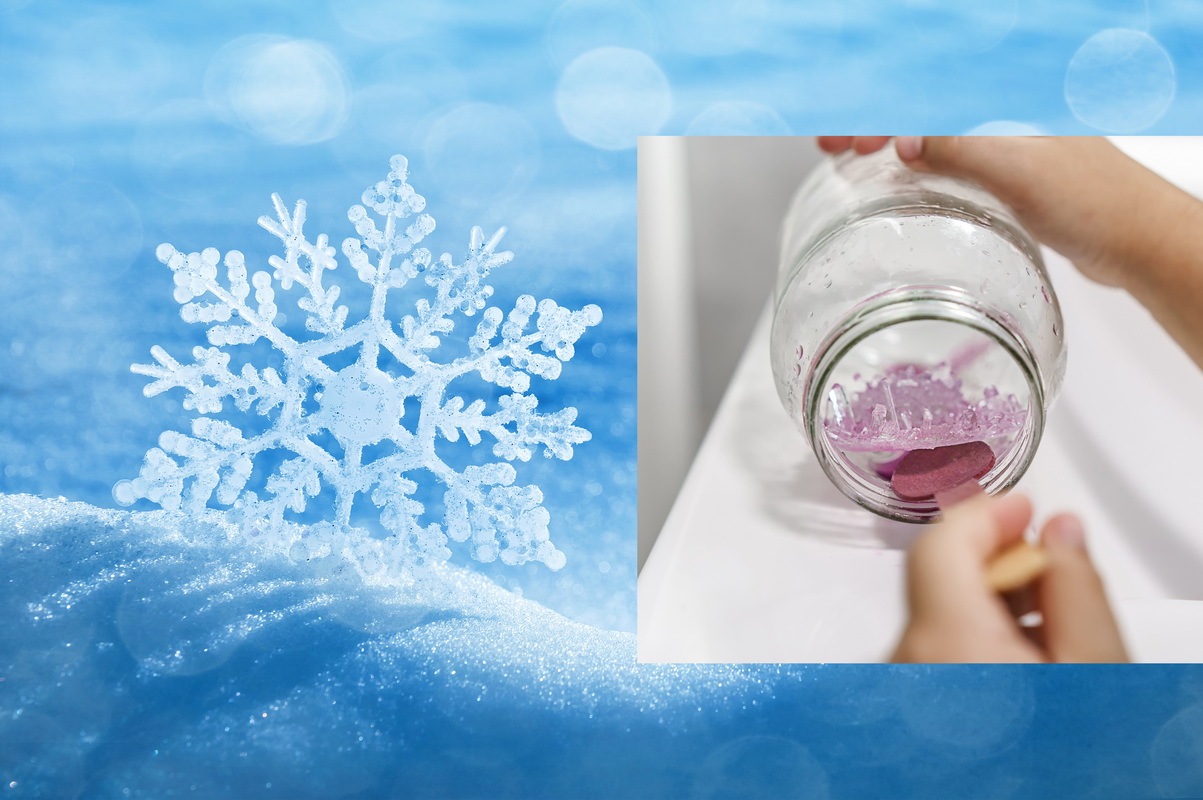
Crystal Snowflakes
Create your own snowflakes without the cold, using the science of crystal growth. Children will have the chance to observe another type of chemical reaction.
- 3 tbsp of borax Powder per jar being used
- 1 cup of boiling water
- Pipe cleaners
- Twist the pipe cleaner into a snowflake shape and tie a piece of string to the top.
- Dissolve 3 tablespoons of borax in one cup of boiling water.
- Tie the snowflake on the string to the pencil.
- Place the pencil horizontally over the jar with the snowflake inside.
- Let the jar sit overnight and watch as the crystals form on the pipe cleaners!
As the water cools, the borax particles come out of the solution and attach to the pipe cleaners, forming crystals.
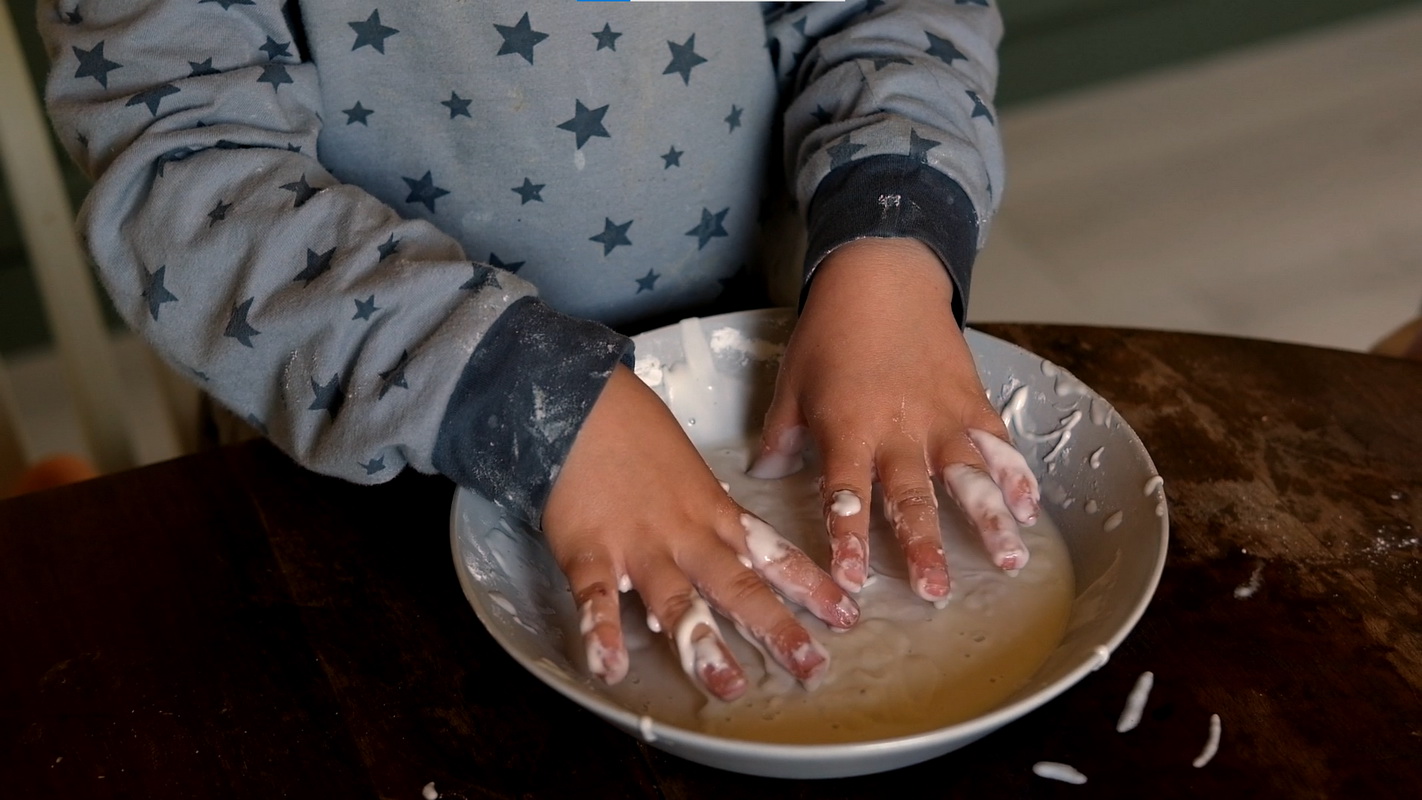
Frozen Oobleck
Explore the fun of a material that is mysterious and hands on, in this cold experiment. Frozen Oobleck is squishy and lower in temperature making it even more exciting to interact with. Children will have a blast while also having the chance to look at different properties of matter.
- Cornstarch
- Food coloring
- Ice cube tray ( silicone molds, or any container to place in the freezer)
Procedure:
- Add ½ cup of cornstarch to the bowl.
- Slowly add ½ cup of water.
- Add food coloring of choice and glitter if using.
- Pour the oobleck into the trays or the containers using.
- Place the containers in the freezer for at least a few hours.
Oobleck doesn’t act like a regular liquid. It has the properties of both a solid and a liquid depending on the amount of stress applied. When there is stress applied the cornstarch and water mixtures act like a solid, then returning back to a liquid when left alone.
These winter experiments are exciting and a great way to add science topics this season. They're perfect for the classroom, home, or even holiday gatherings. Keep the learning going all winter long.
Related Articles

Cancel anytime
You'll be able to manage the favorite spreadsheets list.
You’ll be able to hide/mark the accomplished tasks.
- School / District Account
- Family Account
- 2 PDF worksheets per day
- Interactive worksheets
- Targeted ads
- KidsAcademy ads
$ 1.99 / month
- Printable and interactive worksheets
- Learning videos
- Ad-free browsing

- Engage students and save time with ready-to-use premium educational activities.
- Unlimited Learning Library access
$9.99 / month


IMAGES
COMMENTS
Nov 21, 2024 · This candy cane experiment explores how fast the candy cane dissolves in different solutions that you can easily make up for yourself, salt water and sugar water. How will the type of liquid affect the results?
Aug 24, 2020 · Explore the science behind candy canes with these easy and creative experiments for kids of all ages. Learn about dissolving, bending, fizzing, crystallizing, and more with candy canes and other simple ingredients.
Nov 26, 2022 · December is the perfect time to do candy cane experiments with your students! These five science experiments are a big hit with kids and are also great for incorporating STEM into your classroom.
Our candy cane experiment explored how a candy cane(the solute) dissolves in different liquids (the solvent): warm water, cold water, Alka-Seltzer and water, vinegar, and vinegar mixed with baking soda. Each liquid has different properties that affect the solubility of the candy cane.
Dec 12, 2022 · Learn how to set up a fair test to find out which liquid makes candy canes dissolve the fastest. Compare the results of hot and cold water, vinegar and other liquids in this fun Christmas science activity.
Dec 27, 2018 · Learn how to make candy cane pieces dance with baking soda and vinegar. This is one of the 12 candy cane science experiments you can try with your kids this season.
Sep 25, 2022 · My printable candy cane science experiment is perfect for learning about science in the classroom and it’s simple enough to do at home with your little ones. Keep reading to discover all kinds of fun candy cane themed science activities for kids in preschool, kindergartners, and toddlers too.
Learn what liquid dissolves candy canes the best in this dissolving candy canes experiment! This is a great winter STEM activity for kids.
Dec 18, 2024 · Candy canes; Cupcake tray (for mixing colored vinegar) How to Set Up the Fizzy Candy Cane Experiment 1. Prepare the Tray. Cover the bottom of the tray with a thick layer of baking soda. Lay the candy canes on top of the baking soda, arranging them however you like—straight, curved, or even spelling out a holiday word like “JOY.”
Dec 16, 2024 · Put one candy cane in each container and hit start on the timer. Observe what is happening with the candy canes. Write down the times it takes for each candy cane to dissolve completely. Snowstorm in a Jar. Create a swirling snow storm but indoors with this engaging and fun experiment.