Color explosion

Chemistry doesn't have to be boring—especially when you can get a cool art project out of it. 

Check out what happens when milk, food coloring, and dish soap create a cool chemical reaction with this experiment from the Nat Geo Kids book Try This! Extreme .

Once you're done, try it again using a small plate full of craft glue instead of milk. Let the glue dry and remove the glue disk from the plate for a visible souvenir of this experiment.

Fill the dish with about half an inch of milk.

Add dots of colors using food coloring. Make whatever pattern you like, but yse plenty of colorful dots.

Drop just one drip of dish detergent in the middle of the milk. Watch what happens! The colors will sink in response to the dish detergent, then emerge again—marbleizing and combining—before stabilizing and standing still

WHAT'S GOING ON

Milk is an emulsion, a suspension of fat droplets in water. This means they’re not mixed in, just hanging in the milk. Food coloring sits in drops in the water, too, making a stable system—until the dish detergent is added. Dish detergents are meant to separate out dirt or grease so they can be washed away. When the dish detergent is added, the suspension is broken up, and the fat droplets all rush to combine with each other, causing the blossoming of color.

After the colors marbleize, try to transfer the pattern onto a piece of paper. Drop the paper flat onto the milk’s surface and allow the liquid to soak it for a moment or two. Then lift the paper by several corners, flip it, and transfer to a paper towel to dry. Then spray it with Clear-Coat or another acrylic art spray to preserve the colors.

Science Lab

(ad) try this extreme: 50 fun & safe experiments for the mad scientist in you, (ad) make this: building thinking, and tinkering projects for the amazing maker in you, (ad) try this: 50 fun experiments for the mad scientist in you.

  • Terms of Use
  • Privacy Policy
  • Your California Privacy Rights
  • Children's Online Privacy Policy
  • Interest-Based Ads
  • About Nielsen Measurement
  • Do Not Sell My Info
  • National Geographic
  • National Geographic Education
  • Shop Nat Geo
  • Customer Service
  • Manage Your Subscription

Copyright © 1996-2015 National Geographic Society Copyright © 2015-2024 National Geographic Partners, LLC. All rights reserved

  • Skip to main content
  • Skip to secondary menu
  • Skip to primary sidebar
  • Skip to footer

Parent Influence

Parent Influence

Words Matter, Choose Wisely

Easy Kids’ Science Experiments with Glue

October 17, 2023 by Adriana Matthews

With the holiday season approaching, some kids’ remote learning, and many switching to homeschool it’s no wonder more families are looking for new ways to keep kids busy. One thing we found is that there are so many science experiments you can enjoy with your kids using glue.

These easy kids’ science experiments with glue will give you something fun to do during the holiday break, rainy days, or cold winter days this year. Glue is fun to do science experiments with due to the chemical makeup. Glue is a safe option to use for younger kids to learn about science without getting into harsh chemicals.

glue and food coloring experiment

Here are just a handful of easy science experiments that you can enjoy doing at home with kids whenever you need to keep the kids entertained or want a new option for your science homeschool unit.

Magnetic Slime

Using just a few ingredients, you can make slime with glue that responds to a magnet. You’ll need liquid starch, glue, iron oxide powder, and a rare earth magnet. Each of these ingredients can be purchased online or at a local craft store. You’ll blend the ingredients and use the rare Earth magnet to pull the slime around.

Make Your Own Glue

Another fun science experiment is to make your own glue. All you need is 1 cup of cornflour or cornstarch, 1 tablespoon of white vinegar, 2 teaspoons of salt, and 4 cups of hot water. Allow your kids to mix these ingredients until they form into homemade glue.

glue and food coloring experiment

Make Puffy Paint

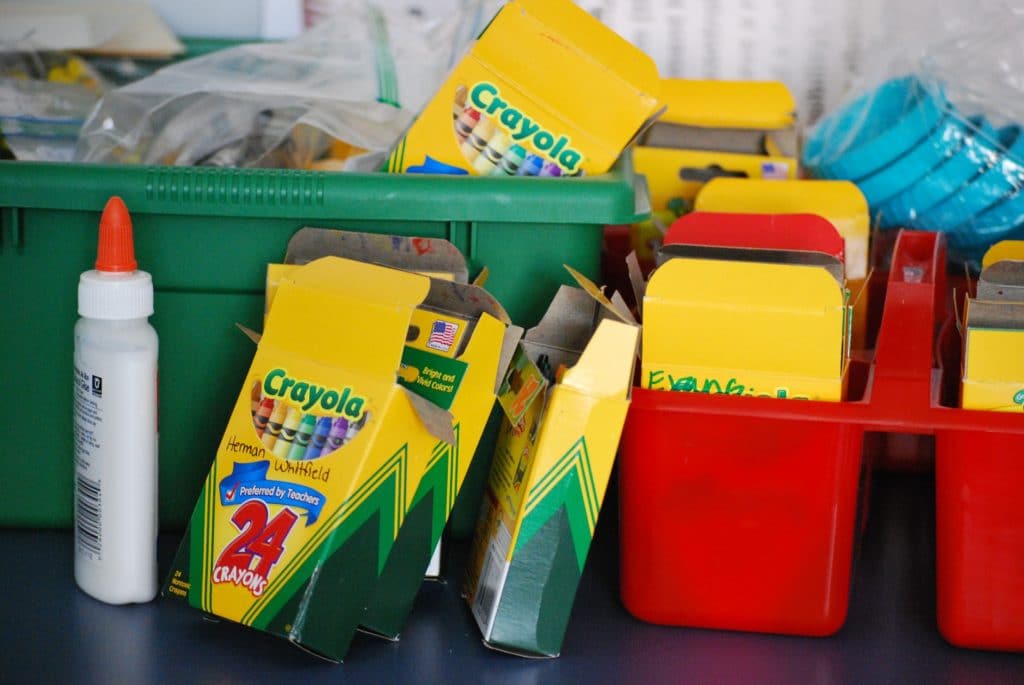
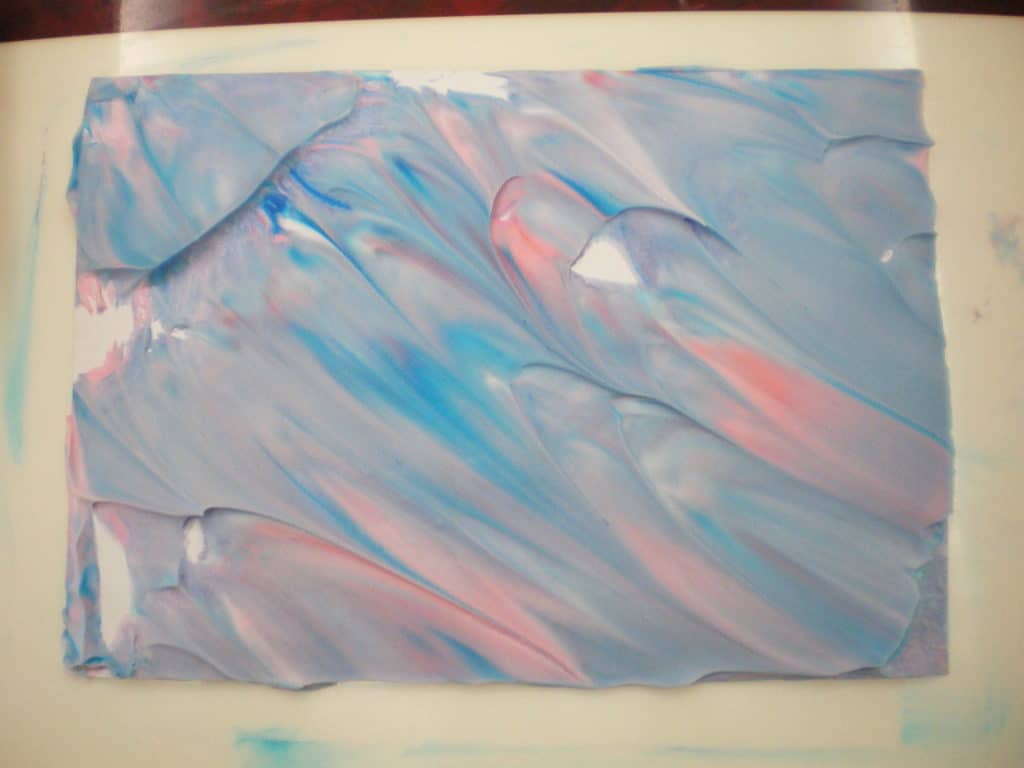
This fun science experiment involves using ½ cup of shaving cream, and ½ cup glue. You can add a couple of drops of your favorite color food dye to make each batch of puffy paint into your favorite colors. This is a fun way to experiment with color mixtures, such as blending red and blue food coloring to make purple all the while learning about science.

Food Coloring Magic

Take some glue and squeeze it out onto a surface, such as a craft table. Take your favorite color food coloring and place a few drops on the glue. Grab a Q-tip and place the end of the Q-tip into dish soap. You’ll then take the Q-tip and dab the food coloring. Watch the beautiful color explosion!

These are just a few of our favorite easy kids’ science experiments featuring glue! You’ll love watching your kids have a blast seeing what other experiments they can come up with using everyday school glue.

We wanted to create a site where all parenting styles are welcomed and anyone can come to read about parenthood. From tips to tricks to positive co-parenting, grand-parenting, and everything in between – the name Parent Influence simply made sense.

All thoughts, stories, and experiences are welcomed here so as long as you remain respectful, considerate, and open-minded to other people’s ways of life and parenting.

  • Terms of Service
  • parentinfluence.com Privacy Notice

"Stained Glass Glue"

In the activity, "Stained Glass Glue," students use common everyday materials to use inquiry when they mix different substances and observe the unusual result of mixing water colors, milk and common dishwashing detergent.

Expand for more detail

Activity Classification and Connections to Related Resources Collapse

Grade level, learning goals, context for use, description and teaching materials, teaching notes and tips, references and resources.

See more MnSTEP Activities »

  • Experiments
  • Secret Science of Stuff
  • Science ABCs

Colors on the Mooooove

  • You are here:
  • American Chemical Society
  • Adventures in Chemistry
  • Colors on the Move

See how detergent interacts with food coloring and milk to make the colors mooove!

boy experimenting

1. Carefully pour some milk in a dish so it just covers the bottom. 

2. Gently add one or two drops of red, blue, and yellow food coloring to the same spot in the center of the milk.

boy experimenting

3.  Dip a cotton swab in your detergent, then gently touch the center of the food coloring. (Do not stir!)

boy experimenting

4.  Push the cotton swab down in the same spot all the way to the bottom of the plate and hold it there.

boy experimenting

5. Dip a new cotton swab in the detergent. Then touch different areas of food coloring along the edge of the plate to see if the color will move again.

 What to expect

plate with food coloring

The first time you touch the food coloring with detergent, the color should zoom to the edge of the plate. When you hold the cotton swab down longer, the color should swirl up from the bottom of the plate. When you touch the food coloring at the edge of the plate, the color should move around, mix, and make cool designs.  

What else could you try?

We used liquid dish detergent to make the colors move. But you could try some other soap or detergent, like shampoo, liquid hand soap, laundry detergent, or regular soap. You could compare the way the different soap or detergent makes the colors move.

cups with liquid

We used regular whole milk but you could try skim milk or half & half. Maybe the type of milk will make the colors move differently.

milk bottles

What’s happening in there? 

Why did the colors move in cool ways? To answer this question, we have to use chemistry. Think about the atoms and molecules that the milk and detergent are made of and why they would act in this crazy way when they are mixed…

milk molecules

The milk is made mostly of water molecules, but it also has fat molecules and protein molecules which are bigger than water molecules.

The detergent is made up of detergent molecules.

The cool thing about the different molecules is that they have positive and negative charges in different areas. Some molecules or parts of molecules have no charges.

When you first put the detergent on the milk, the negative end of the detergent molecules line up with the positive end of the water molecules. This causes the detergent molecules to zoom out in every direction over the surface of the milk and push the food coloring out toward the edge of the plate.

molecules

And when you dip the detergent down into the milk or bring it to the food coloring at the edge of the plate, there is usually some more swirling and movement of color.

The negative charge on the detergent molecules are attracted to the positive parts of the protein molecules. And the uncharged part of the detergent molecules lines up with the uncharged fat molecules.

There is a lot of moving as the detergent and other molecules twist and turn and switch around and different parts of the molecules come together. The food coloring molecules interact and ride along with all the other molecules, and that’s what makes the colors move!

  • Resources for Parents and Teachers
  • Terms of Use
  • Accessibility

Copyright © 2024 American Chemical Society

glue and food coloring experiment

  • Grades 6-12
  • School Leaders

NEW: Classroom Clean-Up/Set-Up Email Course! 🧽

72 Easy Science Experiments Using Materials You Already Have On Hand

Because science doesn’t have to be complicated.

Easy science experiments including a "naked" egg and "leakproof" bag

If there is one thing that is guaranteed to get your students excited, it’s a good science experiment! While some experiments require expensive lab equipment or dangerous chemicals, there are plenty of cool projects you can do with regular household items. We’ve rounded up a big collection of easy science experiments that anybody can try, and kids are going to love them!

Easy Chemistry Science Experiments

Easy physics science experiments, easy biology and environmental science experiments, easy engineering experiments and stem challenges.

Skittles form a circle around a plate. The colors are bleeding toward the center of the plate. (easy science experiments)

1. Taste the Rainbow

Teach your students about diffusion while creating a beautiful and tasty rainbow! Tip: Have extra Skittles on hand so your class can eat a few!

Learn more: Skittles Diffusion

Colorful rock candy on wooden sticks

2. Crystallize sweet treats

Crystal science experiments teach kids about supersaturated solutions. This one is easy to do at home, and the results are absolutely delicious!

Learn more: Candy Crystals

3. Make a volcano erupt

This classic experiment demonstrates a chemical reaction between baking soda (sodium bicarbonate) and vinegar (acetic acid), which produces carbon dioxide gas, water, and sodium acetate.

Learn more: Best Volcano Experiments

4. Make elephant toothpaste

This fun project uses yeast and a hydrogen peroxide solution to create overflowing “elephant toothpaste.” Tip: Add an extra fun layer by having kids create toothpaste wrappers for plastic bottles.

Girl making an enormous bubble with string and wire

5. Blow the biggest bubbles you can

Add a few simple ingredients to dish soap solution to create the largest bubbles you’ve ever seen! Kids learn about surface tension as they engineer these bubble-blowing wands.

Learn more: Giant Soap Bubbles

Plastic bag full of water with pencils stuck through it

6. Demonstrate the “magic” leakproof bag

All you need is a zip-top plastic bag, sharp pencils, and water to blow your kids’ minds. Once they’re suitably impressed, teach them how the “trick” works by explaining the chemistry of polymers.

Learn more: Leakproof Bag

Several apple slices are shown on a clear plate. There are cards that label what they have been immersed in (including salt water, sugar water, etc.) (easy science experiments)

7. Use apple slices to learn about oxidation

Have students make predictions about what will happen to apple slices when immersed in different liquids, then put those predictions to the test. Have them record their observations.

Learn more: Apple Oxidation

8. Float a marker man

Their eyes will pop out of their heads when you “levitate” a stick figure right off the table! This experiment works due to the insolubility of dry-erase marker ink in water, combined with the lighter density of the ink.

Learn more: Floating Marker Man

Mason jars stacked with their mouths together, with one color of water on the bottom and another color on top

9. Discover density with hot and cold water

There are a lot of easy science experiments you can do with density. This one is extremely simple, involving only hot and cold water and food coloring, but the visuals make it appealing and fun.

Learn more: Layered Water

Clear cylinder layered with various liquids in different colors

10. Layer more liquids

This density demo is a little more complicated, but the effects are spectacular. Slowly layer liquids like honey, dish soap, water, and rubbing alcohol in a glass. Kids will be amazed when the liquids float one on top of the other like magic (except it is really science).

Learn more: Layered Liquids

Giant carbon snake growing out of a tin pan full of sand

11. Grow a carbon sugar snake

Easy science experiments can still have impressive results! This eye-popping chemical reaction demonstration only requires simple supplies like sugar, baking soda, and sand.

Learn more: Carbon Sugar Snake

12. Mix up some slime

Tell kids you’re going to make slime at home, and watch their eyes light up! There are a variety of ways to make slime, so try a few different recipes to find the one you like best.

Two children are shown (without faces) bouncing balls on a white table

13. Make homemade bouncy balls

These homemade bouncy balls are easy to make since all you need is glue, food coloring, borax powder, cornstarch, and warm water. You’ll want to store them inside a container like a plastic egg because they will flatten out over time.

Learn more: Make Your Own Bouncy Balls

Pink sidewalk chalk stick sitting on a paper towel

14. Create eggshell chalk

Eggshells contain calcium, the same material that makes chalk. Grind them up and mix them with flour, water, and food coloring to make your very own sidewalk chalk.

Learn more: Eggshell Chalk

Science student holding a raw egg without a shell

15. Make naked eggs

This is so cool! Use vinegar to dissolve the calcium carbonate in an eggshell to discover the membrane underneath that holds the egg together. Then, use the “naked” egg for another easy science experiment that demonstrates osmosis .

Learn more: Naked Egg Experiment

16. Turn milk into plastic

This sounds a lot more complicated than it is, but don’t be afraid to give it a try. Use simple kitchen supplies to create plastic polymers from plain old milk. Sculpt them into cool shapes when you’re done!

Student using a series of test tubes filled with pink liquid

17. Test pH using cabbage

Teach kids about acids and bases without needing pH test strips! Simply boil some red cabbage and use the resulting water to test various substances—acids turn red and bases turn green.

Learn more: Cabbage pH

Pennies in small cups of liquid labeled coca cola, vinegar + salt, apple juice, water, catsup, and vinegar. Text reads Cleaning Coins Science Experiment. Step by step procedure and explanation.

18. Clean some old coins

Use common household items to make old oxidized coins clean and shiny again in this simple chemistry experiment. Ask kids to predict (hypothesize) which will work best, then expand the learning by doing some research to explain the results.

Learn more: Cleaning Coins

Glass bottle with bowl holding three eggs, small glass with matches sitting on a box of matches, and a yellow plastic straw, against a blue background

19. Pull an egg into a bottle

This classic easy science experiment never fails to delight. Use the power of air pressure to suck a hard-boiled egg into a jar, no hands required.

Learn more: Egg in a Bottle

20. Blow up a balloon (without blowing)

Chances are good you probably did easy science experiments like this when you were in school. The baking soda and vinegar balloon experiment demonstrates the reactions between acids and bases when you fill a bottle with vinegar and a balloon with baking soda.

21 Assemble a DIY lava lamp

This 1970s trend is back—as an easy science experiment! This activity combines acid-base reactions with density for a totally groovy result.

Four colored cups containing different liquids, with an egg in each

22. Explore how sugary drinks affect teeth

The calcium content of eggshells makes them a great stand-in for teeth. Use eggs to explore how soda and juice can stain teeth and wear down the enamel. Expand your learning by trying different toothpaste-and-toothbrush combinations to see how effective they are.

Learn more: Sugar and Teeth Experiment

23. Mummify a hot dog

If your kids are fascinated by the Egyptians, they’ll love learning to mummify a hot dog! No need for canopic jars , just grab some baking soda and get started.

24. Extinguish flames with carbon dioxide

This is a fiery twist on acid-base experiments. Light a candle and talk about what fire needs in order to survive. Then, create an acid-base reaction and “pour” the carbon dioxide to extinguish the flame. The CO2 gas acts like a liquid, suffocating the fire.

I Love You written in lemon juice on a piece of white paper, with lemon half and cotton swabs

25. Send secret messages with invisible ink

Turn your kids into secret agents! Write messages with a paintbrush dipped in lemon juice, then hold the paper over a heat source and watch the invisible become visible as oxidation goes to work.

Learn more: Invisible Ink

26. Create dancing popcorn

This is a fun version of the classic baking soda and vinegar experiment, perfect for the younger crowd. The bubbly mixture causes popcorn to dance around in the water.

Students looking surprised as foamy liquid shoots up out of diet soda bottles

27. Shoot a soda geyser sky-high

You’ve always wondered if this really works, so it’s time to find out for yourself! Kids will marvel at the chemical reaction that sends diet soda shooting high in the air when Mentos are added.

Learn more: Soda Explosion

Empty tea bags burning into ashes

28. Send a teabag flying

Hot air rises, and this experiment can prove it! You’ll want to supervise kids with fire, of course. For more safety, try this one outside.

Learn more: Flying Tea Bags

Magic Milk Experiment How to Plus Free Worksheet

29. Create magic milk

This fun and easy science experiment demonstrates principles related to surface tension, molecular interactions, and fluid dynamics.

Learn more: Magic Milk Experiment

Two side-by-side shots of an upside-down glass over a candle in a bowl of water, with water pulled up into the glass in the second picture

30. Watch the water rise

Learn about Charles’s Law with this simple experiment. As the candle burns, using up oxygen and heating the air in the glass, the water rises as if by magic.

Learn more: Rising Water

Glasses filled with colored water, with paper towels running from one to the next

31. Learn about capillary action

Kids will be amazed as they watch the colored water move from glass to glass, and you’ll love the easy and inexpensive setup. Gather some water, paper towels, and food coloring to teach the scientific magic of capillary action.

Learn more: Capillary Action

A pink balloon has a face drawn on it. It is hovering over a plate with salt and pepper on it

32. Give a balloon a beard

Equally educational and fun, this experiment will teach kids about static electricity using everyday materials. Kids will undoubtedly get a kick out of creating beards on their balloon person!

Learn more: Static Electricity

DIY compass made from a needle floating in water

33. Find your way with a DIY compass

Here’s an old classic that never fails to impress. Magnetize a needle, float it on the water’s surface, and it will always point north.

Learn more: DIY Compass

34. Crush a can using air pressure

Sure, it’s easy to crush a soda can with your bare hands, but what if you could do it without touching it at all? That’s the power of air pressure!

A large piece of cardboard has a white circle in the center with a pencil standing upright in the middle of the circle. Rocks are on all four corners holding it down.

35. Tell time using the sun

While people use clocks or even phones to tell time today, there was a time when a sundial was the best means to do that. Kids will certainly get a kick out of creating their own sundials using everyday materials like cardboard and pencils.

Learn more: Make Your Own Sundial

36. Launch a balloon rocket

Grab balloons, string, straws, and tape, and launch rockets to learn about the laws of motion.

Steel wool sitting in an aluminum tray. The steel wool appears to be on fire.

37. Make sparks with steel wool

All you need is steel wool and a 9-volt battery to perform this science demo that’s bound to make their eyes light up! Kids learn about chain reactions, chemical changes, and more.

Learn more: Steel Wool Electricity

38. Levitate a Ping-Pong ball

Kids will get a kick out of this experiment, which is really all about Bernoulli’s principle. You only need plastic bottles, bendy straws, and Ping-Pong balls to make the science magic happen.

Colored water in a vortex in a plastic bottle

39. Whip up a tornado in a bottle

There are plenty of versions of this classic experiment out there, but we love this one because it sparkles! Kids learn about a vortex and what it takes to create one.

Learn more: Tornado in a Bottle

Homemade barometer using a tin can, rubber band, and ruler

40. Monitor air pressure with a DIY barometer

This simple but effective DIY science project teaches kids about air pressure and meteorology. They’ll have fun tracking and predicting the weather with their very own barometer.

Learn more: DIY Barometer

A child holds up a pice of ice to their eye as if it is a magnifying glass. (easy science experiments)

41. Peer through an ice magnifying glass

Students will certainly get a thrill out of seeing how an everyday object like a piece of ice can be used as a magnifying glass. Be sure to use purified or distilled water since tap water will have impurities in it that will cause distortion.

Learn more: Ice Magnifying Glass

Piece of twine stuck to an ice cube

42. String up some sticky ice

Can you lift an ice cube using just a piece of string? This quick experiment teaches you how. Use a little salt to melt the ice and then refreeze the ice with the string attached.

Learn more: Sticky Ice

Drawing of a hand with the thumb up and a glass of water

43. “Flip” a drawing with water

Light refraction causes some really cool effects, and there are multiple easy science experiments you can do with it. This one uses refraction to “flip” a drawing; you can also try the famous “disappearing penny” trick .

Learn more: Light Refraction With Water

44. Color some flowers

We love how simple this project is to re-create since all you’ll need are some white carnations, food coloring, glasses, and water. The end result is just so beautiful!

Square dish filled with water and glitter, showing how a drop of dish soap repels the glitter

45. Use glitter to fight germs

Everyone knows that glitter is just like germs—it gets everywhere and is so hard to get rid of! Use that to your advantage and show kids how soap fights glitter and germs.

Learn more: Glitter Germs

Plastic bag with clouds and sun drawn on it, with a small amount of blue liquid at the bottom

46. Re-create the water cycle in a bag

You can do so many easy science experiments with a simple zip-top bag. Fill one partway with water and set it on a sunny windowsill to see how the water evaporates up and eventually “rains” down.

Learn more: Water Cycle

Plastic zipper bag tied around leaves on a tree

47. Learn about plant transpiration

Your backyard is a terrific place for easy science experiments. Grab a plastic bag and rubber band to learn how plants get rid of excess water they don’t need, a process known as transpiration.

Learn more: Plant Transpiration

Students sit around a table that has a tin pan filled with blue liquid wiht a feather floating in it (easy science experiments)

48. Clean up an oil spill

Before conducting this experiment, teach your students about engineers who solve environmental problems like oil spills. Then, have your students use provided materials to clean the oil spill from their oceans.

Learn more: Oil Spill

Sixth grade student holding model lungs and diaphragm made from a plastic bottle, duct tape, and balloons

49. Construct a pair of model lungs

Kids get a better understanding of the respiratory system when they build model lungs using a plastic water bottle and some balloons. You can modify the experiment to demonstrate the effects of smoking too.

Learn more: Model Lungs

Child pouring vinegar over a large rock in a bowl

50. Experiment with limestone rocks

Kids  love to collect rocks, and there are plenty of easy science experiments you can do with them. In this one, pour vinegar over a rock to see if it bubbles. If it does, you’ve found limestone!

Learn more: Limestone Experiments

Plastic bottle converted to a homemade rain gauge

51. Turn a bottle into a rain gauge

All you need is a plastic bottle, a ruler, and a permanent marker to make your own rain gauge. Monitor your measurements and see how they stack up against meteorology reports in your area.

Learn more: DIY Rain Gauge

Pile of different colored towels pushed together to create folds like mountains

52. Build up towel mountains

This clever demonstration helps kids understand how some landforms are created. Use layers of towels to represent rock layers and boxes for continents. Then pu-u-u-sh and see what happens!

Learn more: Towel Mountains

Layers of differently colored playdough with straw holes punched throughout all the layers

53. Take a play dough core sample

Learn about the layers of the earth by building them out of Play-Doh, then take a core sample with a straw. ( Love Play-Doh? Get more learning ideas here. )

Learn more: Play Dough Core Sampling

Science student poking holes in the bottom of a paper cup in the shape of a constellation

54. Project the stars on your ceiling

Use the video lesson in the link below to learn why stars are only visible at night. Then create a DIY star projector to explore the concept hands-on.

Learn more: DIY Star Projector

Glass jar of water with shaving cream floating on top, with blue food coloring dripping through, next to a can of shaving cream

55. Make it rain

Use shaving cream and food coloring to simulate clouds and rain. This is an easy science experiment little ones will beg to do over and over.

Learn more: Shaving Cream Rain

56. Blow up your fingerprint

This is such a cool (and easy!) way to look at fingerprint patterns. Inflate a balloon a bit, use some ink to put a fingerprint on it, then blow it up big to see your fingerprint in detail.

Edible DNA model made with Twizzlers, gumdrops, and toothpicks

57. Snack on a DNA model

Twizzlers, gumdrops, and a few toothpicks are all you need to make this super-fun (and yummy!) DNA model.

Learn more: Edible DNA Model

58. Dissect a flower

Take a nature walk and find a flower or two. Then bring them home and take them apart to discover all the different parts of flowers.

DIY smartphone amplifier made from paper cups

59. Craft smartphone speakers

No Bluetooth speaker? No problem! Put together your own from paper cups and toilet paper tubes.

Learn more: Smartphone Speakers

Car made from cardboard with bottlecap wheels and powered by a blue balloon

60. Race a balloon-powered car

Kids will be amazed when they learn they can put together this awesome racer using cardboard and bottle-cap wheels. The balloon-powered “engine” is so much fun too.

Learn more: Balloon-Powered Car

Miniature Ferris Wheel built out of colorful wood craft sticks

61. Build a Ferris wheel

You’ve probably ridden on a Ferris wheel, but can you build one? Stock up on wood craft sticks and find out! Play around with different designs to see which one works best.

Learn more: Craft Stick Ferris Wheel

62. Design a phone stand

There are lots of ways to craft a DIY phone stand, which makes this a perfect creative-thinking STEM challenge.

63. Conduct an egg drop

Put all their engineering skills to the test with an egg drop! Challenge kids to build a container from stuff they find around the house that will protect an egg from a long fall (this is especially fun to do from upper-story windows).

Learn more: Egg Drop Challenge Ideas

Student building a roller coaster of drinking straws for a ping pong ball (Fourth Grade Science)

64. Engineer a drinking-straw roller coaster

STEM challenges are always a hit with kids. We love this one, which only requires basic supplies like drinking straws.

Learn more: Straw Roller Coaster

Outside Science Solar Oven Desert Chica

65. Build a solar oven

Explore the power of the sun when you build your own solar ovens and use them to cook some yummy treats. This experiment takes a little more time and effort, but the results are always impressive. The link below has complete instructions.

Learn more: Solar Oven

Mini Da Vinci bridge made of pencils and rubber bands

66. Build a Da Vinci bridge

There are plenty of bridge-building experiments out there, but this one is unique. It’s inspired by Leonardo da Vinci’s 500-year-old self-supporting wooden bridge. Learn how to build it at the link, and expand your learning by exploring more about Da Vinci himself.

Learn more: Da Vinci Bridge

67. Step through an index card

This is one easy science experiment that never fails to astonish. With carefully placed scissor cuts on an index card, you can make a loop large enough to fit a (small) human body through! Kids will be wowed as they learn about surface area.

Student standing on top of a structure built from cardboard sheets and paper cups

68. Stand on a pile of paper cups

Combine physics and engineering and challenge kids to create a paper cup structure that can support their weight. This is a cool project for aspiring architects.

Learn more: Paper Cup Stack

Child standing on a stepladder dropping a toy attached to a paper parachute

69. Test out parachutes

Gather a variety of materials (try tissues, handkerchiefs, plastic bags, etc.) and see which ones make the best parachutes. You can also find out how they’re affected by windy days or find out which ones work in the rain.

Learn more: Parachute Drop

Students balancing a textbook on top of a pyramid of rolled up newspaper

70. Recycle newspapers into an engineering challenge

It’s amazing how a stack of newspapers can spark such creative engineering. Challenge kids to build a tower, support a book, or even build a chair using only newspaper and tape!

Learn more: Newspaper STEM Challenge

Plastic cup with rubber bands stretched across the opening

71. Use rubber bands to sound out acoustics

Explore the ways that sound waves are affected by what’s around them using a simple rubber band “guitar.” (Kids absolutely love playing with these!)

Learn more: Rubber Band Guitar

Science student pouring water over a cupcake wrapper propped on wood craft sticks

72. Assemble a better umbrella

Challenge students to engineer the best possible umbrella from various household supplies. Encourage them to plan, draw blueprints, and test their creations using the scientific method.

Learn more: Umbrella STEM Challenge

Plus, sign up for our newsletters to get all the latest learning ideas straight to your inbox.

Science doesn't have to be complicated! Try these easy science experiments using items you already have around the house or classroom.

You Might Also Like

Magic Milk Experiment How to Plus Free Worksheet

Magic Milk Experiment: How-To Plus Free Worksheet

This classic experiment teaches kids about basic chemistry and physics. Continue Reading

Copyright © 2024. All rights reserved. 5335 Gate Parkway, Jacksonville, FL 32256

Glitter Glue

Creating sea glass with elmer’s glue: a diy tutorial.

Photo of author

By Scott Graham

Have you ever strolled along a beach and wondered how sea glass gets its uniquely smooth and frosted appearance? If you’re someone who loves combining creativity and DIY projects, making sea glass is a perfect activity for you. With just a few supplies, including Elmer’s glue, you can easily make your own sea glass at home! In this guide, we provide a step-by-step process to making sea glass with Elmer’s glue that will have you producing beautiful pieces in no time. Get ready to dive into a fun and rewarding crafting experience.

Ingredients and Materials

Ingredients And Materials

  • Glass pieces
  • Elmer’s glue
  • Food coloring (optional)
  • Bowl for mixing
  • Measuring spoons
  • Paper towels

To make realistic-looking sea glass with Elmer’s glue, you only need a few simple materials that you probably already have at home. The most important, of course, are the glass pieces that you will transform into sea glass. You can use any clear glass pieces such as bottles, jars, or even old windows. Broken or chipped pieces are also perfect to create a more natural look.

Next, you will need Elmer’s glue. Any type of Elmer’s glue will work, but the clear variety is recommended since it will not affect the color of your sea glass. Of course, feel free to experiment with different types of glue. If you happen to have UHU glue or wood glue, you might want to check our articles on how to make slime with UHU glue or how to make slime with wood glue .

You may want to add some food coloring to your glue mixture. This will add a splash of color to your sea glass and contribute to the overall realistic look. Check out our article on how to color glue for tips on how to create the perfect hue for your sea glass.

Other materials you will need include a paintbrush to apply the glue, a bowl for mixing, water to thin the glue mixture if necessary, measuring spoons to measure out the ingredients, and paper towels to dry and remove the sea glass from the work surface.

Ingredients

When it comes to making sea glass with Elmer’s glue, the ingredients required to make the glue solution are simple and readily available. Here are the ingredients you will need to make this project a success:

  • 1 bottle of Elmer’s glue (clear or white)
  • A few drops of food coloring or acrylic paint
  • 1/2 teaspoon of dish soap
  • 1/2 cup of water

The Elmer’s glue will be the base of the glue solution, while the food coloring or acrylic paint will provide the color to create your desired hue of sea glass. The dish soap is a surfactant that will lower the surface tension of the glue solution, which will allow it to spread evenly on the glass. Meanwhile, water will be used to dilute the glue and make it easier to apply.

It’s important to note that, while it’s possible to make sea glass with other types of glue or adhesive, Elmer’s glue is the most effective option for this particular project. If you’re interested in making other types of DIY crafts with glue, such as glitter tattoos or slime, check out these other tutorials for how to make slime with Tide and glue , how to make slime with glue stick and Tide , how to make glitter tattoo glue , or how to make slime with glitter glue without borax .

Step-by-Step Procedure

Step-By-Step Procedure

As a side note, if you’re interested in making slime, check out our article on how to make slime with glitter glue without borax .

Step 1: Preparing the Glass

Before you can start making sea glass with Elmer’s glue, you need to prepare the glass pieces that you plan to use. Here are the materials that you will need for this step:

Materials
Any type of clear glass works for this project, such as bottles, vases, or jars.
You will need gloves, protective eyewear, and a dust mask.
A glass cutter will be necessary to break the glass into desired sizes and shapes.

Once you have prepared the necessary materials, it’s important to ensure that you work safely. Wear gloves to protect your hands from cuts and shards, and protective eyewear to protect your eyes from flying debris. If you are cutting the glass inside, it is recommended to wear a dust mask to avoid breathing in any glass particulates.

Using a glass cutter, carefully cut the glass into desired shapes and sizes. You might want to experiment with different shapes to achieve a more natural-looking sea glass finish. After cutting, use sandpaper to smooth out sharp edges or chips on the glass.

Be sure to wash the glass pieces thoroughly to remove any dirt and debris. Avoid using soap, as it may interfere with the glue solution and prevent the sea glass from forming properly. After washing, let the glass pieces dry completely before proceeding to the next step.

Step 2: Mixing the Glue Solution

In this step, we’ll create the glue solution that will give our glass that coveted sea glass effect. Here are the materials and ingredients you’ll need:

  • Elmer’s Glue-All
  • A stirring utensil (a popsicle stick works well)

Mixing the glue solution:

1. Begin by pouring a generous amount of Elmer’s Glue-All into the bowl. Eye-balling the amount is fine, but try to use at least half a bottle for best results.

2. Add a small amount of water and stir the mixture together with the stirring utensil. Begin with a 1:1 ratio of glue to water, but you may need to adjust the ratio depending on the thickness of the mixture. The mixture should have a consistency similar to melted ice cream.

3. Keep stirring the mixture for several minutes. You want to ensure that the glue and water are fully and evenly mixed.

4. TIP: If you want to color your sea glass, you can add a few drops of food coloring to the glue solution during this step. Mix well until the color is even throughout. Blue and green colors work well for a traditional sea glass look, but feel free to experiment with other colors!

5. Once your glue solution is fully mixed, you’re ready to move onto the next step!

Step 3: Applying the Glue Solution

After preparing the glass, it’s time for the most exciting part: applying the glue solution! This step is where the magic happens and the glass begins to take on a frosted, sea glass appearance. The following is a step-by-step guide on how to apply the glue solution to achieve optimal results.

  • Apply the glue onto the glass: Take the glue and brush it onto the glass surface evenly. Make sure that the glue is not too thin or too thick. A thin coat will not produce the desired effect, while a thick coat will result in lumps and uneven surfaces. A good rule of thumb is to use a quarter-size amount of glue for every two square inches of glass.
  • Add color: After the glue is applied, this is the perfect opportunity to add dye or food coloring. The color will give the sea glass a beautiful, translucent appearance. If you choose to add color, make sure to add it before the glue starts to dry. A few drops of dye or food coloring should suffice.
  • Let the glue dry: Depending on the temperature and humidity, the glue can dry within 24-48 hours. Keep the glass in a dry and cool place to help the glue dry more effectively.
  • Repeat the process: Once the first layer has dried, repeat the previous steps of applying the glue and adding the color. The more layers you add, the thicker and more opaque the sea glass will become. The key is to apply each layer evenly and let it dry completely before applying the next layer.
  • Final touch: Once you have applied the desired number of layers, let the glue dry completely for a few days. You can add a final coat of glue to the sea glass for a glossy finish. Simply repeat the process of applying the glue and letting it dry completely.

Remember, the glue solution is what gives the glass its frosted and sea glass-like appearance, so take your time and apply the glue evenly. Practice makes perfect, so don’t be afraid to experiment with different techniques to get the desired result.

Step 4: Drying and Removing the Glass

Once you have finished applying the glue solution, you’ll need to let the glass dry. This is a crucial step to ensure the sea glass effect looks realistic and natural. Here are the steps to successfully dry and remove the glass:

  • Set aside to dry: After applying the glue solution, let your glass pieces sit or hang in a well-ventilated area for 48-72 hours. This may seem like a long time, but it’s essential to allow the glue to fully dry and cure.
  • Test the glass: Once the glass has dried, test the hardness of the glue to make sure it is fully dry. To do this, press your fingernail into the glue on the glass. If it leaves an impression, it needs more time to dry.
  • Remove the glass: Once the glue is completely dry, carefully remove the glass pieces from the surface they are on. You may need to use a scraper or paintbrush to loosen any glue that has dripped below the glass piece.
  • Trim the edges: Use a pair of scissors or craft knife to trim any rough or excess edges of the glue on the glass to achieve a smooth and polished look.

It’s important to stay patient during this step as rushing the drying process could potentially ruin all the hard work you did so far. Once the glass is dry and the excess glue has been trimmed, your sea glass pieces are finally ready to be used.

Tips and Tricks

After completing the DIY sea glass project with Elmer’s glue, there are some tips and tricks that can help enhance the results. By following these suggestions, you can ensure that your handmade sea glass pieces turn out beautifully and are the envy of all your friends. From proper drying techniques to experimenting with different colors, these tips and tricks will help you take your sea glass crafting skills to the next level and produce stunning, professional-looking results every time. So, let’s dive into the details and discover the secrets of perfect DIY sea glass!

Tips for Better Results

To achieve the best results when making sea glass with Elmer’s glue, it’s important to follow the right process and use the right materials. However, there are some additional tips you can follow to make the process even easier and more successful. Here are some tips for better results:

  • Use high-quality glass: While you want to save money where you can, opting for low-quality glass can result in less-than-ideal results. Choose high-quality glass to ensure the best outcome possible.
  • Avoid over-mixing the solution: Over-mixing the glue solution can cause it to become too thick and difficult to work with. Stir the solution only until it is well combined.
  • Allow plenty of time to dry: Waiting for the glue to dry can be the most challenging part of the process, but it’s essential to achieving the desired texture and finish. Be patient and allow plenty of time for the glue to completely dry before moving on to the next step.
  • Experiment with colors: While the classic sea glass look is achieved with clear glue, you can also experiment with adding food coloring or even paint to the glue solution to achieve different colors and finishes.
  • Keep it thin: Applying too thick of a layer of glue can result in the glass appearing cloudy or losing its clarity. Opt for thinner layers instead.

By following these tips, you’ll be well on your way to creating beautiful sea glass pieces with Elmer’s glue. Remember to be patient and enjoy the process – crafting is all about having fun and bringing your unique style to each project.

Possible Variations

If you want to add some uniqueness to your sea glass project, here are some possible variations you can try:

Variation Description
You can add a few drops of food coloring to the glue solution to create colored sea glass. Experiment with different colors to achieve your desired shade.
You can also use different types of glass, such as old mason jars or wine bottles, to create a variety of sea glass shapes and sizes.
You can add sand or glitter to the glue solution for extra texture and sparkle. Just make sure to mix it well before applying to the glass.
You can experiment with different types of glue, such as clear or glitter glue, to achieve a different aesthetic with your sea glass project. Keep in mind that different glues may have different drying times and consistencies.
You can apply a second coat of glue solution once the first coat has dried for a thicker, more durable sea glass finish.

Remember to have fun and get creative with your sea glass project. The possibilities for variations are endless, and you never know what unique result you might achieve.

In conclusion, making sea glass with Elmer’s glue is a fun and easy DIY project for those who want to create beautiful and unique pieces of art. By following the step-by-step procedure outlined in this guide and using the recommended materials and ingredients, you can create breathtaking sea glass that looks just like the real thing.

However, it’s important to note that while this method is effective, it may not produce the same results as natural sea glass found on the beach. Some variations in color and texture may occur, which can add to the charm of your handmade sea glass pieces.

Remember to take your time with each step and follow the recommended drying times for best results. Don’t be afraid to experiment with different materials or colors to create a personalized touch to your sea glass creations.

And lastly, have fun! Making sea glass with Elmer’s glue can be an enjoyable and therapeutic activity that allows you to unleash your creativity and make something beautiful. So gather your materials, set aside some time, and let your imagination run wild!

Frequently Asked Questions

What is sea glass.

Sea glass is a type of glass that has been frosted and smoothed by the action of the waves and sand over time.

What type of glass can be used?

Any type of clear or colored glass can be used. However, it’s best to avoid using tempered or safety glass.

What type of Elmer’s glue is best?

Clear Elmer’s glue works best for this project, as it dries transparent.

How long does it take for the sea glass to dry?

It usually takes 24-48 hours for the glue solution to completely dry and solidify.

Can food coloring be used?

Yes, food coloring can be added to the glue solution to create colored sea glass.

Can other types of glue be used?

Other types of white glue or Mod Podge can be used as a substitute for Elmer’s glue.

How can the sea glass be cleaned after drying?

The sea glass can be gently washed with warm water to remove any excess glue residue.

What are some creative ways to use sea glass?

Sea glass can be used for jewelry making, mosaic art, or as decorative pieces in a vase or candle holder.

Can sea glass be made without using Elmer’s glue?

Yes, sea glass can be made using other methods, such as tumbling glass with sand and water in a rock tumbler.

Is this a suitable project for children?

Yes, this is a simple and fun project for children to do with adult supervision.

  • Elmer’s Glue DIY Sea Glass

A Beginner’s Guide to Gluing Moss to Cardboard

Ultimate guide to repairing glue down vinyl plank flooring, leave a comment cancel reply.

Save my name, email, and website in this browser for the next time I comment.

glue and food coloring experiment

THANKS FOR AN INCREDIBLE 2024 HAPPY MOM SUMMIT!

No Guilt Mom

3 Dish Soap Science Tricks You Can DO Right Now!

We all want fun stuff to do with our kids – but many times the kids activities we find are too complicated and require way too much work. Not these!

Using dish soap and a few common kitchen ingredients, you can create amazing dish soap science projects  that your kids will talk about for days to come.

Want a fun kid activity that needs only a couple of supplies? Do these 3 activities tonight with only dish soap and other ingredients you have in your kitchen.

I want to be a fun mom.  Don’t you?

However, I must admit that I get a tad overwhelmed.  Many kid activities also come with a huge list of needed supplies.

Go out and buy this obscure glue from a craft store across town.  Get this size (and only this size) of plastic baggies – and then of course your local grocery store is out of everything you need.

Let’s stop the madness!!

Here are three activities that you already have the supplies for:

No, really.

  • Pepper Magic

Colored Milk Art

  • Dish soap silly putty

Not only can you pull these items together in five minutes flat, but they will also amaze your kiddos.  And when you’re ready, I have 15 Very Simple Science Experiments You Can Do With Your Kids here.

Dish Soap Science: Pepper Magic

On our recent Disney cruise , one of our waiters amused my kids with this trick at dinner one night.

All you need is:

So easy, yes?

First, fill a shallow plate with water and sprinkle pepper on the surface.  Ask your child to stick his finger right in the center.

Nothing will happen.

Now, you act surprised and tell him, “Here, let me see your hand.”  (secretly squeeze a little dish soap on your own fingers before)

“I forgot to give your hand a little bit of magic.”

Massage his fingertips with your own.

“Now, try.”

He will stick his finger in the water again.  This time, his finger will repel the tiny pepper granules causing them to scurry to the edge of the plate.

easy magic trick with dish soap and pepper

For this experiment, you’ll need:

  • food coloring
  • a cotton swab

For another magical experience, fill a shallow plate with milk.  Squeeze food coloring in the middle of the plate on the milk’s surface.

colored milk kid activity

Dab a cotton swab with dish soap and stick in the center of the food coloring.

milk and dish soap science experiment

Sit back and watch the color show!

Dish Soap Silly Putty

When you are all done with the magic, keep that dish soap handy and create a putty for your kids to play with on their own.  All you need is:

  • corn starch

I found this activity originally on Smart Schoolhouse .  You will love how easy it is!

Simply mix together 2 tbs corn starch and 1.5 tablespoons dish soap.  Stir for about 10 seconds.  Pick up the clay and mix in your hands a little more.

And you’re done.  Seriously, that’s it!

What fun will you create tonight?

How can I have more fun, quality time with my family?

  • Sign up to get No Guilt Mom emails. If you need someone to lift you up and empathize with you – while pushing to grow in all the best ways – welcome to No Guilt Mom. Plus, I send you a free gift when you sign up that will immediately reduce your stress.
  • Enroll in Calm & Happy Parenting. Serious about changing the way your family communicates and deals with conflict? After taking our signature course, you’ll get more cooperation from your kids and WAY less pushback. Plus, you’ll create a strong family bond where your kids come to talk with you about issues instead of hiding them.

Recommended Posts

glue and food coloring experiment

15 Very Simple Science Experiments (Using What You Already Have at Home!)

glue and food coloring experiment

The No Fight Trick to Chores!

glue and food coloring experiment

Make Your Own Lava Lamp: A very simple 5-minute science experiment

glue and food coloring experiment

20 At Home Science Crafts for Kids

Article info, popular posts.

JoAnn Crohn

  • JoAnn Crohn

CEO/Founder at No Guilt Mom

She’s an accomplished writer, author, podcast host of the No Guilt Mom podcast, and speaker who appears in national media. Work with her personally in Balance VIP

  • Kids Activities
  • The Ultimate Guide On How to Be a Happy Mom
  • Podcast Episode: Mom Hacks That Stick & Work with ADHD
  • Podcast Episode 162: Finding it hard to relax? 5 ways to make it happen
  • Could this be why you’re so frustrated as a mom?
  • Need a hobby, Mama? This Cricut project will bring you crafting joy.
  • Four Steps to Deal with your Tween’s Next Mood Swing
  • How to get family to help around the house (when they’ve been doing nothing)
  • How to stop feeling like you’re the worst mom
  • 72 Ways to Compliment a Child (Instead of saying “good job”)
  • 5 Simple Steps To Teach Your Child How to Make Friends
  • ABC MOUSE: Is it worth paying for?
  • 5 Ways for Kids to Have Fun on Game Day

Similar Posts

Podcast Episode 199: 5 Tips to Prioritize Self-Care & Raise Good Humans with Hunter Clarke-Fields

Podcast Episode 199: 5 Tips to Prioritize Self-Care & Raise Good Humans with Hunter Clarke-Fields

We have so much going on as busy moms…how are we supposed to prioritize self-care as a mom? It’s so hard to find the time, but we have 5 easy tips on how to do it, and in the process, raise some pretty good humans as well!

Snickers Pie Cookies

Snickers Pie Cookies

Fried Snickers bars were once all the rage.  When I was living in LA, fried junk food was popping up at county fairs all across…

Chill Out Bath Bombs

Chill Out Bath Bombs

After the hectic bustle of the holdays, what better gift is there than one that will help the giftee relax?  These bath bombs are simple…

How to Teach Your Child to Follow Directions

How to Teach Your Child to Follow Directions

We all want our children to be creative beings and be able to explore their creativity.  But sometimes life calls for following directions.  Prepare your…

Podcast Episode 242: Spotting the Signs of Burnout And What to Do About It

Podcast Episode 242: Spotting the Signs of Burnout And What to Do About It

Are you juggling the demands of motherhood, managing your career, nurturing relationships, and pursuing personal interests—all while trying to maintain some semblance of sanity? If…

5 Powerful Ways to Motivate Kids to Do Well in School

5 Powerful Ways to Motivate Kids to Do Well in School

Motivation for kids at school is a tricky thing to master. These 5 methods encourage intrinsic motivation without the use of rewards and create internally motivated children.

Science Fun

Science Fun

Googly Eye Slime Easy Science Experiment

In this fun and easy science experiment for kids, we’re going to make googly eye slime.

  • Borax Powder
  • Food coloring
  • Googly eyes
  • Measuring cup
  • Mixing spoon

Instructions:

  • Mix ½ cup of glue with ½ cup of warm water in a mixing bowl.
  • Stir to mix the water and glue.
  • Sprinkle some googly eyes into the glue mixture.
  • Add food coloring and/or glitter if desired.
  • Next, mix ½ tsp of borax with ½ cup of hot water. The hot water from the faucet should work perfectly. Mix the borax powder until dissolved. It is fine if some of the borax powder settles to the bottom and not mix into the solution completely.
  • Slowly add the borax solution into the glue mixture. Stir continuously as you add in the borax solution and soon your glue mixture will stiffen to the consistency of slime.

EXPLORE AWESOME SCIENCE EXPERIMENT VIDEOS!

How it Works:

The borax solution links the long polymers in the glue which holds them together and allows the slime to flow. While the slime can flow like a liquid, it does not have a constant viscosity. Viscosity is simply a resistance to flow. Water has a low viscosity and flows easily but honey has a higher viscosity and flows slowly. Since slime does not has a constant viscosity, it is known as a Non-Newtonian fluid. 

Make This A Science Project:

Try different types of glue. Try different types of activators like contact lenses solution, liquid starch, or baking soda. 

EXPLORE TONS OF FUN AND EASY SCIENCE EXPERIMENTS!

SUBSCRIBE AND NEVER MISS A NEW SCIENCE FUN VIDEO!

previous experiment

Next experiment.

  • Create video
  • Record screen
  • Create event

glue and food coloring experiment

Please enable JavaScript to experience Vimeo in all of its glory.

glue food coloring and soap experiment

from Kids Fun Science

I think Magic Milk experiment was like my 3rd experiment on youtube and love watching the milk exploded and make cool patterns and I still love it. Over the years I have my top 10 experiments that I love, but this one is now my favorite. I could not stop trying it.

So similar to Magic milk, but you use glue instead of milk. This is like Magic Milk on steroids. To see full experiment visit youtube.com/c/kidsfunscience #KidsFunScience #gluefoodcoloringanddissoap #science #gluefoodcoloringandsoapexperiment #Gluefoodcoloringsoapexperiment #milkfoodcoloringsoapexperiment #kidsscience #kidsscienceexperiments #

  • Skip to main content
  • Skip to primary sidebar
  • Amazon Favorites
  • Search this website

A Dab of Glue Will Do

Little Learners, Big Ideas

PS PK K 1 2

Oil and Water Science Activity

I'd love it if you shared!

  • Facebook 12
  • Pinterest 4.7K

glue and food coloring experiment

Kids in preschool, kindergarten, and first grade learn simple and fundamental science concepts from performing this oil and water science activity . Learn why oil and water do not mix and thrill the kids by creating gorgeous food coloring fireworks in a jar.

A little girl looking at a glass full of liquid with food coloring

Getting the Oil and Water Experiment Ready

We headed into the kitchen to gather the following supplies:

  • Clear container
  • Vegetable oil
  • Food coloring

We filled our clear container about 3/4 full of water. We used a tall vase, but any kind of clear cup, jar, or bowl will work.

The kids added a layer of vegetable oil to the vase. We noted how oil and water don’t mix and how all of the oil floated on top of the water layer.

Kids in preschool, kindergarten, and first grade learn simple and fundamental science concepts from performing this oil and water science activity.

Doing the Oil and Water Science Experiment

The kids chose a few colors to add to the oil and water. Carefully, they squeezed one drop at a time into the vase. We dropped about 6 drops of food coloring of various colors into the vase.

Kids in preschool, kindergarten, and first grade learn simple and fundamental science concepts from performing this oil and water science activity.

Next, we waited. We noticed how the food coloring beaded up into little droplets that hovered in the oil layer, right above the layer of water. The kids kept asking when or if something else was going to happen and I kept telling them to be patient and wait without disturbing the vase.

Within a couple of minutes the waiting paid off. Without any warning, one drop of food coloring suddenly fell into the water layer, leaving a colored trail behind. The kids were so excited!

Kids in preschool, kindergarten, and first grade learn simple and fundamental science concepts from performing this oil and water science activity.

One by one, each droplet of food coloring burst through the oil layer and mixed into the water . Watching the trail of colors spread and mix was the best part!

Kids in preschool, kindergarten, and first grade learn simple and fundamental science concepts from performing this oil and water science activity.

The Science Behind Mixing Oil and Water

This is such a simple science experiment, but it teaches big, important concepts!

First, it is easy to observe how oil and water do not mix , no matter how much they are stirred. This is because oil is made of carbon and hydrogen atoms that form non polar chemical bonds. Water is made of oxygen and hydrogen atoms that form polar chemical bonds. It’s pretty advanced chemistry for a 5 or 6-year-old! The important part is that oil and water are made of different kinds of chemical bonds that prevent them from mixing.

Kids in preschool, kindergarten, and first grade learn simple and fundamental science concepts from performing this oil and water science activity.

Food coloring is water-based so it will only dissolve in the water layer. The drops of food coloring bead up in the oil layer and rest between the oil and water until gravity eventually pulls it down into the lower water layer. Once it bursts into the water layer it immediately starts to mix in and spread out. This creates a spectacular fireworks effect!

It’s also easy to observe how oil floats on top of water . Oil is less dense than water, meaning that it will always end up on top, no matter which liquid is added first.

Doing science with this oil and water science activity is a fun and educational way to learn!

More Science Activities and Ideas

Walking Water Science for Kids

Science Notebook

Plants Unit

Want science planned for you ALL YEAR LONG?!

Do you want science planned for the ENTIRE CALENDAR YEAR !? This Endless Science Mega Bundle will save you so much time and keep your students engaged and excited about learning . This amazing resource contains 53 science topics  including  life science , physical science , earth science , and animal studies .

You May Also Enjoy These Posts

To connect summer with science, we’ve created these four August Science Experiments so your students can conduct science experiments, make hypotheses, and ask and answer scientific questions.

Reader Interactions

20 comments.

' src=

April 19, 2022 at 12:46 am

Good information. Lucky me I ran across your blog by accident (stumbleupon). I’ve saved as a favorite for later!

' src=

April 19, 2022 at 9:20 pm

This blog was… how do you say it? Relevant!! Finally I’ve found something that helped me. Cheers!

' src=

April 19, 2022 at 11:31 pm

Right here is the right website for everyone who wishes to find out about this topic. You realize so much its almost tough to argue with you (not that I really would want to…HaHa). You certainly put a new spin on a topic that has been written about for decades. Great stuff, just great!

' src=

April 20, 2022 at 4:54 am

This is the right webpage for anybody who would like to understand this topic.

You realize so much its almost hard to argue with you (not that I actually would want to…HaHa). You definitely put a fresh spin on a topic which has been discussed for ages. Excellent stuff, just excellent!

' src=

April 23, 2022 at 10:57 pm

This is the right website for anybody who really wants to understand this topic. You know so much its almost tough to argue with you (not that I personally will need to…HaHa). You certainly put a brand new spin on a subject that’s been written about for ages. Wonderful stuff, just excellent!

' src=

April 24, 2022 at 9:47 pm

Hello there! I could have sworn I’ve been to your blog before but after going through some of the articles I realized it’s new to me.

Anyways, I’m certainly happy I came across it and I’ll be bookmarking it and checking back frequently!

' src=

April 28, 2022 at 4:59 am

I’m not sure where you’re getting your info, but great topic. I needs to spend some time learning much more or understanding more. Thanks for magnificent info I was looking for this information for my mission.

' src=

May 2, 2022 at 7:35 am

Oh my goodness! Awesome article dude! Thank you so much, However I am experiencing troubles with your RSS. I don’t understand the reason why I can’t subscribe to it. Is there anybody having similar RSS problems? Anybody who knows the answer will you kindly respond? Thanks!!

' src=

May 2, 2022 at 7:59 am

Hello to every body, it’s my first pay a quick visit of this weblog; this webpage includes remarkable and genuinely fine material designed for visitors.

[…] Oil and Water Science Activity […]

[…] Oil and Water […]

[…] Kids in preschool, kindergarten, and first grade learn simple and fundamental science concepts from performing this oil and water science activity.. Read more at adabofgluewilldo.com […]

[…] OIL AND WATER SCIENCE EXPERIMENT From A Dab Of Glue Will Do […]

[…] EXPERIÊNCIA DE CIÊNCIA DE PETRÓLEO E ÁGUA com um pouco de cola serve […]

[…] Source: adabofgluewilldo.com […]

Leave a Comment Cancel reply

Your email address will not be published. Required fields are marked *

This site uses Akismet to reduce spam. Learn how your comment data is processed .

Go Science Girls

25 Amazing Science Experiments with Food Color

  • October 24, 2020
  • Science Experiments

Here is a list of Food Color Science Experiments that you can try at home with your kids.

Science Experiments With Food Color

The STEM activities, experiments and science lesson plans that will help you teach amazing science concepts to kids, even if you’ve never stepped foot in a lab.

Science Experiments with Food Color

All the experiments are simple science activities but with really great effects and good scientific concepts. Have a look!

1. Rainbow in a Jar Water Density Experiment

glue and food coloring experiment

Water science is amazing and experimenting with water and food color using simple kitchen ingredients offers a great science experiment that teaches water density in a jar. Rainbow in a jar water density science experiment makes great play activity and an amazing science lesson too! Enjoy finding out about the basics of color mixing all the way up to the density of liquids with this one simple water density experiment.

Have a look at the colorful sugar water density activity, fun science experiments for kids: Rainbow in a Jar Water Density Experiment

2. Science Experiment with Water Oil and Food Color

Lets Kids Learn Density

We decided to make fireworks at home. Did you hear it right? Yes, you did. At home DIY explosives. But do not panic as they are as safe to make and can be played by little ones. In addition, you could teach density science to kids. Does that sound exciting? We decided to make two difference density science experiments to teach my daughters. Believe me, you will become a kid when you see the results. You will start loving to do this quite often. We did not buy any expensive things but used only the items available at home. The best part – you can do both these experiments in less than ten minutes.

Are you interested in this awesome science activity? Check out for more details here: Science Experiment with Water Oil and Food Color

3. Science Experiment with Milk and Food Color

glue and food coloring experiment

Here is another most preferred and easiest science experiment that you can try at home using a few simple kitchen ingredients from your home. The best part is, it just takes minutes to set up the experiment table and finishes in minutes to see the amazing results. Toddlers, pre-schoolers, and even kindergarten children can work on this. Best for 5-6 year old or older children to explain the various science concepts of surface tension, chemistry, forces, and properties of matter.

Do you want try this simple and easy science activity? Here we go with the complete description of the experiment here: Science Experiment with Milk and Food Color

4. Science Experiment with Food Color and Flowers

glue and food coloring experiment

Does flowers change color with food colors? Wondering how? You can now change the flower color at home and at any time during the year. Let’s try this natural science experiment with white roses and Let us understand the science behind this experiment. Absorption of water in flowers/plants is the scientific concept kids can learn in a fun way while investigating this super simple science experiment. This experiment can be done with  preschoolers  and they will love to make their hands colorful too.  Other kids including  Kindergarteners  and  7 – 9-year-old kids  can do this experiment, not just for fun but to learn some science as well. They can change the variables and see the changes in the results.

Check out for full details of the experiment here: Science Experiment with Food Color and Flowers

5. Science Experiment with Food Color and Fizzy Tablets

glue and food coloring experiment

Things that fizz are always sound interesting and mysterious too for kids especially pre-schoolers. Today let’s clear the question marks on our kid’s faces when they see fizzy things with another wonderful density science experiment. This is a super fun and simple experiment to explain kids about the fizzy science and density of liquids. Density is a good concept to be explained for older kids. So the experiment would be well suited for kids of 5 to 6 year olds or older kids of aged 7+

Let’s get into the lava lamp experiment here: Science Experiment with Food Color and Fizzy Tablets

6. Science Experiment with Food Color and Baking Soda

glue and food coloring experiment

Volcano making can be a lot of fun for a summer family project. This fizzy science experiment gives young children an exciting and learning experience as they watch and learn about incredible geological formations while experimenting volcano. This is a perfect activity for 3-4 year olds, 5-6 year olds and up. Even pre-schoolers can enjoy the activity by watching.

Find more details about this super fun and easy experiments here: Science Experiment with Food Color and Baking Soda

7. Celery with Food Coloring Science Experiment

glue and food coloring experiment

This easy science experiment with Celery and Food Color is a fantastic fun for kids of all ages. All you need is full a celery plant, food colouring and water to explore simple biology. Super easy supplies and set up for simple biology. Explore capillary action or the process of water moving upward through thin tubes in the plant’s stem. It defies gravity! Biology is always fascinating for kids because it’s all about the living world around us. Activities like this celery osmosis science experiment show us how living cells move water. 

Let’s get started with this simple kid’s-friendly science experiment to demonstrate osmosis: Celery with Food Coloring Science Experiment

8. Cool Walking Water Science Experiment

glue and food coloring experiment

Let your kids have a lot of fun with this summer science project! Summer is the perfect time to get the kids excited with a hands on activity! The Walking Water experiment is super easy to set up and has a big wow factor.  Kids can watch the colored water walk along paper towels and fill an empty glass. It’s very cool! This cool walking water science experiment gives young children an exciting and learning experience as they watch and learn about incredible capillary action of moving water.

Want to see how cool it is for yourself? Watch it in action! Click on Cool Walking Water Science Experiment

9. Science Experiment with Ice Salt Food Color

glue and food coloring experiment

If the kids don’t care too much for all of that science stuff, this still makes for an interesting, non-toxic and fun activity. This is such a fun and beautiful activity that is perfect for Pre-school aged Children and above! It’s a fun ice and salt experiment that is low prep and low cost too! These ice sculptures catch the sunlight so beautifully too! 

This was such a fun activity for my kids, I hope you give it a try too! For full details of this experiment, click on: Science Experiment with Ice Salt Food Color

10. Rain Cloud Science Experiment

glue and food coloring experiment

Here is a super simple science experiment that teaches children about clouds and rain. It’s great fun to do at home or in the classroom and this rain cloud science experiment only uses commonly found ingredients. This is a perfect activity for 3-4 year olds, 5-6 year olds and up. Even preschoolers can enjoy the activity by watching.

Super simple and using only a few commonly found ingredients, I knew we had to give it a go. It might just explain the concept of rain as a visual representation. Click on Rain Cloud Science Experiment

11. Absorbing Experiment with Food Color and Sugar Cubes

glue and food coloring experiment

We often observe some things absorb water like sponges, underpants, etc. Through this super cool science experiment, we are trying an absorbing experiment with a twist and trying to halt the process as a way of investigating which materials absorb water and which don’t! Can you try to predict which material will stop the water spreading through the cubes the best? Want to know your predictions are correct or went wrong? Check out Absorbing Experiment with Food Color and Sugar Cubes to know and learn more details about this cool classic experiment in detail.

12. Simple Color Mixing Science Experiments for Preschoolers

glue and food coloring experiment

Simple and a very few ingredients from your kitchen can fascinate your children amazingly while learning simple science involved. Simple color mixing science experiment helps children learn the properties of colors while making something attractive. Best suitable for pre-schoolers, kindergarten, and even toddlers.

Get the simple step-by-step ingredients required to do this experiment hasslefree: Click on Simple Color Mixing Science Experiments for Pre-schoolers

13. Does the Color of Water Affect Its Temperature?

glue and food coloring experiment

Does the color of water affect its temperature? This simple science experiment is a fun way to learn a little more about the light spectrum. We experience light every day but we don’t often think about why we see certain colors or how these colors might affect the temperature of a liquid. In this simple experiment, kids will learn a little more about light reflection and absorption and how colors relate to thermal energy. Learn about the light spectrum and the various heat absorption levels of different colored liquids in this fun science experiment! Click on Does the Color of Water Affect Its Temperature?

14. Science Experiment: Changing Ants Colors!

glue and food coloring experiment

Ant science experiments are loads of fun and perfect for spring and summer time!  This unique science project is totally safe for both your kiddos and the ants too! Ghost ants can be a nuisance, but outside they can also provide hours of educational opportunities. And the best part is that you already have the supplies at home!  It’s the perfect ant experiment!

Do you want have fun play with ants while learning little science? Check out: Science Experiment: Changing Ants Colors!

15. Science Experiment with Food Color to Create Water Cycle in a Bottle

glue and food coloring experiment

Make your child’s play or free time exciting and creative with this super cool, simple and easy science activity of creating water cycle in a bottle. Easy to set-up, investigate, and easy to rinse away! This spring, make this easy  water cycle in a bottle science experiment  with your class to illustrate how the water cycle works up close and personal. Kids will love making their own water biomes in a bottle and will be fascinated to watch the water turn into a gas, turn back into a liquid, and fall back into the bottom of the bottle.

Check out for more information of the experiment in detail: Science Experiment with Food Color to Create Water Cycle in a Bottle

16. Make an Orange Volcano Science Experiment

glue and food coloring experiment

Showing kids about chemistry science concepts is not too hard anymore! Here is the fascinating experiment that teaches kids about how exothermic chemical reactions work using a few kitchen and household items in an easy and educational way. Also it shows a great demonstration on how chemical reactions work out by creating all sorts of fun fall themed activity. Children in grades 3-4 and even older children can have a great visual witness on creating density column.

With just a few inexpensive supplies, you too can make your own orange volcanoes too. Trust us, the kids will LOVE these! And so will you! Check out Make an Orange Volcano Science Experiment

17. Hot and Cold Temperature Science Experiment with Food Color

glue and food coloring experiment

Kids are very familiar and love to play with colored water but this time we are going to make their playful activity more fun and interesting by introducing them to cold and hot temperature waters. Kids will be fascinated to learn the science behind this amazing reaction between hot and cold temperature water. It can be used for imaginative and sensory play. This is the perfect sensory activity for 3-4 year olds and 5-6 year olds. But how can we do that super classic science experiment? Check out here for complete instructions of this cool science experiment: Hot and Cold Temperature Science Experiment with Food Color

18. Science Experiment with Plants and Food Color

glue and food coloring experiment

Food color plus water plus plants is an awesome combination to show how plants absorb water! This is a great science activity which is pretty cool to watch colors change. In this experiment, food color and cabbage leaves are used amazingly to show the kids how plants absorb water and nutrients up through their stems. Also, this experiment is done using white flowers too to extend the experiment and make the concept easily understandable by the kids.

Get more details of the experiment by just clicking on Science Experiment with Plants and Food Color

19. Squirt Gun Volcanoes using Food Color Science Experiment

glue and food coloring experiment

Children find playing with squirt guns and different color liquids fun and exciting! Let us make their interest of playing with these items, a science lesson or activity in order to inspire them towards learning simple science concepts by investigating this easy and simple science activity of creating volcanoes. Kindergarten, pre-schoolers, and toddlers enjoy watching revealing colors whereas older kids investigate and learn the simple science concept of chemical reactions.

Check out this fantastic simple science experiment with step-by-step instructions here: Squirt Gun Volcanoes using Food Color Science Experiment

20. Convection in Glass Science Experiment with Food Color and Glasses

glue and food coloring experiment

Have you ever fascinated to perform a simple science activity using CD’s, glass jars, and food color? Though it is a new combination of supplies to do a science experiment but we can do an amazing science activity with these simple supplies that are easily available in our home along with some other kitchen hold items and a magical ingredient, food color. Kids get a change to extend the experiment using other types of liquid solutions. Sounds interesting and exciting right? Check out for full description of this amazing science activity here: Convection in Glass Science Experiment with Food Color and Glasses

21. Food Color Diffusion in Different Temperatures of Water

glue and food coloring experiment

A great visual demonstration that shows and explains kids about how food colors diffuse in different temperatures of water! This is an awesome indoor and outdoor science fair project, gives young and older children an exciting and learning experience as they get an opportunity to watch and observe the outcome results while experimenting with food colors.

This experiment can be done with pre-schoolers not only to have a lot of fun in making their hands colorful but also to introduce them to the little and simple science concepts. Other kids including Kindergarteners and 7 – 9-year-old kids can do this experiment, not just for fun but to learn some science as well.

Before you start with this awesome science experiment, you need to go through the full description of this science activity here: Food Color Diffusion in Different Temperatures of Water

Want to convert your kitchen as a little science lab? If you are a home schooling parent or a teacher searching for kid-friendly and fun filled science activities and experiments, then you are at the right place. Food color either in the form of powder or liquid, it is inexpensive, nontoxic and easy to find at the grocery store making it perfect for science experiments with young and older children. When you are using food coloring for science experiments make sure that everyone is wearing old clothes and cover your work area with newspapers or plastic since food coloring can stain.

Angela

Leave a Reply Cancel Reply

Your email address will not be published. Required fields are marked *

Name  *

Email  *

Add Comment  *

Save my name, email, and website in this browser for the next time I comment.

Post Comment

Get Your ALL ACCESS Shop Pass here →

Little bins for little hands logo

DIY Science Kits For Kids

Science is a wonderful thing for kids! There is so much to learn and discover right around us. Many science concepts start in the kitchen with simple materials you already have on hand. Fill a plastic tote with easy-to-find supplies, and you will have a homemade science kit filled with learning opportunities that are sure to keep them busy all year long!

DIY science kit supplies list

DIY Science Experiments for Kids

We love simple science experiments you can do at home or in the classroom. I wanted to assemble a kids’ science kit to show you how simple it is to try your own science experiments at home.

Most of our favorite science supplies for kids are super simple to find at the grocery store or dollar store, and you may already have many items at home. However, I have also added a few of our favorite science tools from Amazon. Read on to find out what to put in an at-home science kit.

Of course, water is an awesome material for science experiments. Make sure to try one of our awesome water science experiments! Grab a container and start filling it!

Join the Library Science Club

What’s our Library Club all about? How about fantastic, instant access downloads to instructions, photos, and templates (for less than a cup of coffee each month)? With just a mouse click, you can find the perfect experiment, activity, or demonstration right now. Learn more:

Click here to check out the Library Club today. Why not give it a try, you can cancel any time!

join the library science club here

What are DIY Science Kits?

While you can search Amazon for various pre-made science kits at various price points, there is so much you can do by making your own science kit.

A DIY science kit is something you assemble for home, school, or group use without buying a toy kit from a store that will only have a few limited activities. Our homemade science kits allow you to use everyday materials in various ways to create fun, engaging, and educational science experiments for kids in preschool right through middle school. Nothing fancy!

Find the best supplies for making your own science kit, simple science experiments, and additional science resources below.

Science Experiments by Age Group

While many experiments can work for various age groups, you will find the best science experiments for specific age groups below.

  • Science Activities For Toddlers
  • Preschool Science Experiments
  • Kindergarten Science Experiments
  • Elementary Science Projects
  • Science Projects For 3rd Graders
  • Science Experiments For Middle Schoolers

Grab the Free MEGA Supply List

glue and food coloring experiment

Amazon Prime – Science Tools To Add

These are some of my favorite science tools for kids, whether you’re in the classroom, at home, or in a group or club setting. Fill out your science/STEM kit!

(Please note that all Amazon links below are affiliate links, meaning this website receives a small percentage of each sale.)

  • Although this is a science kit with experiments to try, I specifically like the test tubes that are supplied. They are super easy to reuse!
  • A magnet set is a must-have addition to a science kit and pairs well with our magnet STEAM pack !
  • Younger kiddos will get a ton of use from this primary science kit ! I know we used our set for years!
  • Snap Circuits Jr is a fantastic way to explore electricity and electronics with curious kiddos!
  • Introduce a microscope to curious kids who always want to look closer!

Science Experiment Suggestions

Below you’ll find some of our favorite science activities that go along with materials from our homemade science kit list. The supplies below are some of the most common materials we always have on hand.

1. ALKA SELTZER TABLETS

Start off your homemade science kit with a fizz and a pop! We love using Alka seltzer tablets in our homemade lava lamps to make these awesome pop rockets .

glue and food coloring experiment

2. BAKING SODA

Baking soda, along with vinegar is one item for your science kit, that you will want to use again and again. A baking soda and vinegar reaction is a classic science experiment and we have so many variations for you to try!

Baking soda is also an ingredient in our popular fluffy slime recipe !

Here are a few of our favorites…

  • Sandbox Volcano
  • Fizzing Slime
  • Balloon Experiment
  • Hatching Dinosaur Eggs
  • Baking Soda Painting
  • Bottle Rocket
  • Lemon Volcano

Check out all our baking soda science experiments !

glue and food coloring experiment

3. BORAX POWDER

Borax powder is a versatile item in your DIY science kit. Use it to make borax slime , or  experiment with growing your own borax crystals.

Borax crystal growing supplies

Check out these fun variations for growing crystals…

science experiments for kids; experiments for kids

Who would have thought that candy and science go together? We even have a bunch of edible slime recipes or taste-safe slime for kids to make and play with.

Candy you could include in your DIY science kit:

  • Skittles for a Skittles Experiment
  • M&Ms for a M&M Science Experiment
  • Check out this science experiment with chocolate
  • Peeps for one of these fun Peeps Science Activities
  • Find out things to do with Jelly Beans
  • Grow sugar crystals with rock candy.

glue and food coloring experiment

5. COFFEE FILTERS

Coffee filters are inexpensive and fun to include in your homemade kit. Combine art and solubility science with these easy ideas…

  • Coffee Filter Flowers
  • Coffee Filter Snowflakes
  • Coffee Filter Apples
  • Coffee Filter Turkeys
  • Coffee Filter Christmas Tree

coffee filter flowers supplies

6. COTTON BALLS

Use cotton balls to explore water absorption for a simple DIY science experiment.

7. COOKING OIL

Oil is a great household item to include in your DIY science kit. Why not make a  Lava Lamp with oil and water, and learn about density simultaneously? Or even make waves in a bottle.

add food coloring

8. CORN STARCH

Cornstarch is an awesome item to have on hand in your kids’ science kit. Mix some cornstarch and water to make oobleck , and explore non-Newtonian fluids!

Also, check out these activities with cornstarch…

  • Electric Cornstarch
  • Cornstarch Slime
  • Cornstarch Dough

adding green water to cornstarch to make oobleck recipe

9. CORN SYRUP

Corn syrup is great for adding to density layer experiments like this one .

10. DISH SOAP

Try our classic  Magic Milk Experiment with this DIY science kit item. It’s also a fun item to have on hand for extra foam with a baking soda volcano .

11. FOOD COLORING

Food coloring is such a versatile item to include in your science kit. Add color when making slime , or oobleck , even to a baking soda and vinegar experiment or ocean sensory bottle … The options are endless!

rainbow slime in clear glass bowls on white background with cotton ball shaped clouds

12. IVORY SOAP

The key ingredient in our expanding ivory soap experiment.

Salt is another must-have item for kids to add to your DIY science kit. Substitute salt for borax powder, as we did, to grow salt crystals .

  • Try painting with salt for a bit of art and science!
  • Learn about salt and ice with our ice fishing experiment.
  • We also used salt for our Salt Water Density Experiment.

glue and food coloring experiment

14. SHAVING FOAM

Shaving foam is a must-have ingredient for making the fluffiest slime! Check out the best fluffy slime recipe of all time!

adding shaving cream to bowl for fluffy slime

Sugar, like salt, is another DIY science kit item that is great for experiments with water. Why not make a rainbow in a jar or explore which solids dissolve in water .

16. VINEGAR

Vinegar is another common must-have household item to add to your science kit. Combine vinegar with baking soda (see above) for lots of fizzing fun or use it on its own!

More Ways to Use Vinegar in Experiments:

glue and food coloring experiment

17. WASHABLE PVA GLUE

PVA glue is one of your must-have slime ingredients for making homemade slime . Clear glue, white glue or glitter glue, each one gives you a different type of slime.

glue and food coloring experiment

Add Cheap Science Tools to Your Science Kit

Our kids’ science kit is also filled with tools and necessary equipment. Dollar store cookie sheets, muffin trays, ice cube trays, and small ramekins are always used to contain the mess, test liquids, sort items, and freeze ice!

A cheap bow, a set of measuring spoons and cups, big spoons, and

I usually always set out a magnifying glass and often a hand mirror. We use tweezers and eye droppers often as well. No kid’s science kit is complete without a pair of safety goggles!

You can check out more about the science tools we use here!

glue and food coloring experiment

More Helpful Science Resources

The following resources feature fantastic printables to add to your DIY science kit or science lesson plans!

SCIENCE VOCABULARY

It is never too early to introduce some fantastic science words to kids. Get them started with a printable science vocabulary word list . You’re definitely going to want to incorporate these science terms into your next science lesson!

WHAT IS A SCIENTIST

Think like a scientist! Act like a scientist! Scientists like you and me are also curious about the world around them. Learn about the different types of scientists and what they do to increase their understanding of their areas of interest. Read What Is A Scientist

SCIENCE PRACTICES

A new approach to teaching science is called Best Science Practices. These eight science and engineering practices are less structured and allow for a more free – flowing approach to problem-solving and finding answers. These skills are critical to developing future engineers, inventors, and scientists!

FUN SCIENCE EXPERIMENTS

Click below to grab our free science challenge calendar and guide to our best science experiments for kids!

Click below to get your quick and easy science challenge calendar. 

glue and food coloring experiment

11 Comments

This is such a great collection of science experiments! I love that I already have most of the item needed around the house! Thanks for sharing!!

your articles is very useful for children. thank you for sharing.

Love this! So many ideas all wrapped in a neat package. Thank you!

  • Pingback: 3 Easy Ways to Recreate Science Night at Home on Any Budget - Just Brennon
  • Pingback: Christmas Science Experiments Printable Cards for 12 Days of Christmas

Science and water experiment is wonderful concept for kid. All handmade science experiment, kid can easily learn and make their own. They can really enjoy when they will do.

  • Pingback: Preschool Science Experiments and Science Activities
  • Pingback: Monthly STEM Activities Calendars for Kids (Free Printable Calendars)
  • Pingback: 100 Days of Summer STEM Activities and Science Experiments
  • Pingback: 20 Best Diy Science Experiments for Kids - Best Collections Ever | Home Decor | DIY Crafts | Coloring | Birthday | Ideas
  • Pingback: The 20 Best Ideas for Diy Science Projects for Kids - Best Collections Ever | Home Decor | DIY Crafts | Coloring | Birthday | Ideas

Comments are closed.

glue and food coloring experiment

Subscribe to receive a free 5-Day STEM Challenge Guide

~ projects to try now ~.

glue and food coloring experiment

IMAGES

  1. DIY Hacks: Glue + Food Coloring = Stained Glass!

    glue and food coloring experiment

  2. Glue + food colouring

    glue and food coloring experiment

  3. Coloring vases/glasses/bowls using Elmers Glue and Food coloring. Step

    glue and food coloring experiment

  4. Tinting Mason Jars With Glue And Food Coloring

    glue and food coloring experiment

  5. Salt, Glue and Watercolour Experiment

    glue and food coloring experiment

  6. Color Jars With Glue & Food Coloring

    glue and food coloring experiment

VIDEO

  1. CHEMISTRY LAB

  2. Simple Food Coloring Experiment

  3. Slime recipe for beginners!! How to make easy basic slime😀

  4. Food coloring experiment with Chandler the mad scientist

  5. How To Make Red White and Blue Slime Made Easy

  6. How To Make Orange Slime Recipe Easy To Make Very Satisfying

COMMENTS

  1. Fun Science Experiment: Glue, Food Colors, and Dish Washing Soap

    In this simple yet cool science experiment, we demonstrate how food colors are spread out when a dish washing soap is poured a top in glue. It's a safe exper...

  2. Glue, food coloring and dish soap Awesome Science

    Glue, food coloring and dish soap Awesome ScienceMade for parents and teachersScience Kits and morehttps://elementarysciencen.wixsite.com/sciencekitsKids Fu...

  3. Stained Glass Glue

    Here's what to do: Place 2 tablespoons of Elmer's glue in a small cup and add 2 teaspoons of water. Stir with a popsicle stick until the glue and water are thoroughly mixed. Pour the glue and water mixture into a lid until the bottom is covered. Be careful not to add too much if you are using a lid. Add 4-5 drops of food coloring to different ...

  4. Color explosion experiment

    Check out what happens when milk, food coloring, and dish soap create a cool chemical reaction with this experiment from the Nat Geo Kids book Try This! Extreme. Once you're done, try it again using a small plate full of craft glue instead of milk. Let the glue dry and remove the glue disk from the plate for a visible souvenir of this experiment.

  5. Easy Kids' Science Experiments with Glue

    This is a fun way to experiment with color mixtures, such as blending red and blue food coloring to make purple all the while learning about science. Food Coloring Magic. Take some glue and squeeze it out onto a surface, such as a craft table. Take your favorite color food coloring and place a few drops on the glue.

  6. Magic Milk Science Experiment

    This science experiment only requires a few common kitchen supplies: Milk (we used whole milk) Casserole dish, baking pan, or plate. Food coloring. Liquid dish soap (make sure it is NOT antibacterial) Magic Milk Printable. Print out a couple of copies of the free printable worksheet available below so the kids could keep track of their results ...

  7. Food Coloring & Glue Stained Glass Art

    Join Cassie our Young Teen librarian as she shows us how to create food coloring & glue stained glass art. Materials used: clear glue (regular or glitter); t...

  8. Stained Glass Art for For Kids Using Food Coloring and Glue

    Clean the glass with some glass cleaner and then place it inside the white frame. Once the frames are ready to go, cover your work surface. I used wax paper and newspapers on top of that. Then, I set out the glitter glue, toothpicks and food coloring, and called in the troops. The kids had so much fun with this project.

  9. PDF Stained "Glass" Glue

    Add 4-5 drops of food coloring to different areas of the glue mixture. 4. In a clean, small cup, add a small amount of liquid dish detergent. 5. Dip a toothpick into the detergent and touch the center of a food-coloring drop and quickly remove the toothpick. Be careful not to stir. Observe how the food coloring moves in

  10. "Stained Glass Glue"

    The student will perform a controlled experiment using a specific step-by-step procedure and present conclusions supported by the evidence. 3. The student will describe states of matter in terms of spaces between particles. ... In Stained Glass Glue food coloring is added to a mixture of Elmer's glue and water. The Elmer's glue contains a ...

  11. Salt Painting Science Experiment

    The more food coloring you use, the darker the color will be. If you are using watercolor paints, take the paint out of the plastic holder and place each color into a cup. Then, add about a half a cup of warm water. Watch as the water begins to turn colors. ... M&M Rainbow Science Experiment - A Dab of Glue Will Do says: November 13, 2017 at 7: ...

  12. Colors on the Move

    Carefully pour some milk in a dish so it just covers the bottom. 2. Gently add one or two drops of red, blue, and yellow food coloring to the same spot in the center of the milk. 3. Dip a cotton swab in your detergent, then gently touch the center of the food coloring. (Do not stir!)

  13. 70 Easy Science Experiments Using Materials You Already Have

    43. "Flip" a drawing with water. Light refraction causes some really cool effects, and there are multiple easy science experiments you can do with it. This one uses refraction to "flip" a drawing; you can also try the famous "disappearing penny" trick. Learn more: Light Refraction With Water.

  14. Kitchen Table Science: Food Coloring Surface Tension

    Start by pouring a small amount of milk into the plate so that the entire surface is covered with about a quarter to a half inch of milk. Dot a few drops of food coloring around the plate, noticing that the drops sit on the surface of the milk, mostly without moving. Next, randomly add a few small drops of the dish soap to the plate.

  15. How to Make Slime

    Instructions. In the mixing bowl, thoroughly mix 1/2 C water, 1/2 C glue, and a few drops of food coloring. Add 1/2 tsp baking soda and mix completely. Add 2 tbsp contact lens solution and stir vigorously until the mixture starts pulling away from the edges of the bowl.

  16. How to Make Sea Glass with Elmer's Glue: A DIY Guide

    Adding food coloring: You can add a few drops of food coloring to the glue solution to create colored sea glass. Experiment with different colors to achieve your desired shade. Using different types of glass: You can also use different types of glass, such as old mason jars or wine bottles, to create a variety of sea glass shapes and sizes.

  17. Science Experiment: Glue, Food Colouring, Dish Soap, and Glitter

    What you need:GlueFood coloursDish soapA plateQ-tipGlitterPlease visit https://www.creatilily.com for more.Music Credits-Licensed to InShot Audio Library:Mus...

  18. 3 Dish Soap Science Tricks You Can DO Right Now!

    For this experiment, you'll need: milk; food coloring; a cotton swab; dish soap; For another magical experience, fill a shallow plate with milk. Squeeze food coloring in the middle of the plate on the milk's surface. Dab a cotton swab with dish soap and stick in the center of the food coloring. Sit back and watch the color show! Dish Soap ...

  19. Googly Eye Slime Easy Science Experiment

    Instructions: Mix ½ cup of glue with ½ cup of warm water in a mixing bowl. Stir to mix the water and glue. Sprinkle some googly eyes into the glue mixture. Add food coloring and/or glitter if desired. Next, mix ½ tsp of borax with ½ cup of hot water. The hot water from the faucet should work perfectly. Mix the borax powder until dissolved.

  20. glue food coloring and soap experiment on Vimeo

    glue food coloring and soap experiment. from Kids Fun Science. 2 years ago. I think Magic Milk experiment was like my 3rd experiment on youtube and love watching the milk exploded and make cool patterns and I still love it. Over the years I have my top 10 experiments that I love, but this one is now my favorite. I could not stop trying it.

  21. Oil and Water Science Activity

    Food coloring; We filled our clear container about 3/4 full of water. We used a tall vase, but any kind of clear cup, jar, or bowl will work. The kids added a layer of vegetable oil to the vase. We noted how oil and water don't mix and how all of the oil floated on top of the water layer. Doing the Oil and Water Science Experiment

  22. 25 Amazing Science Experiments with Food Color

    Celery with Food Coloring Science Experiment. This easy science experiment with Celery and Food Color is a fantastic fun for kids of all ages. All you need is full a celery plant, food colouring and water to explore simple biology. Super easy supplies and set up for simple biology. Explore capillary action or the process of water moving upward ...

  23. Food Dye & Glue Suncatchers

    Food dye suncatchers are super fun to make. It's like a tie dye ornament for your window! They're so easy — just glue & food coloring (plus a few other thing...

  24. DIY Science Kits For Kids

    15. SUGAR. Sugar, like salt, is another DIY science kit item that is great for experiments with water. Why not make a rainbow in a jar or explore which solids dissolve in water. 16. VINEGAR. Vinegar is another common must-have household item to add to your science kit.

  25. Color Changing Milk

    Get the full course at: http://www.MathTutorDVD.comIn this experiment, you'll learn how to take white milk, dish soap, and food coloring, and use these to di...